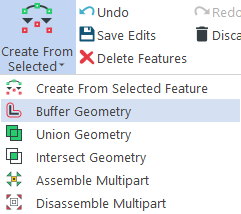
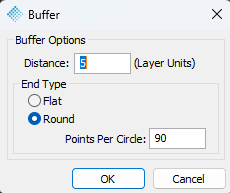
The Buffer Geometry command  on the Feature Edit tab and allows the user to create buffer areas around features. The user may set the buffer distance, end types (flat or rounded), and points per circle, which are found in Feature Edit Options. If Auto-Z is enabled, then these settings will be applied during buffer creation. The buffer command also supports points, lines, and polygons as well as multi-part geometries. The user can buffer multiple features at a time.
1. In Feature Edit Options on the Geometry tab, be sure the desired settings are entered for the buffer.
2. Set the desired feature layer on which to create the buffer. Note that this must be a polygon layer.
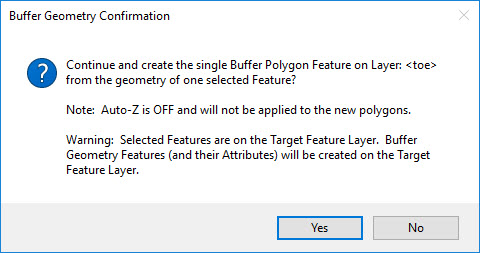
3. Click the Buffer Geometry tool on the Feature Edit toolbar to execute the tool. The user will see a confirmation dialog confirming the buffer(s) to be created (if the Buffer Geometry confirmation checkbox is checked on the Confirm tab). In the bottom left of the application, you will see a message that LP360 is performing the action.
4. Once created, the buffer will be added to the TOC and to the map.