*This feature is available in the Standard license level and above for LP360.
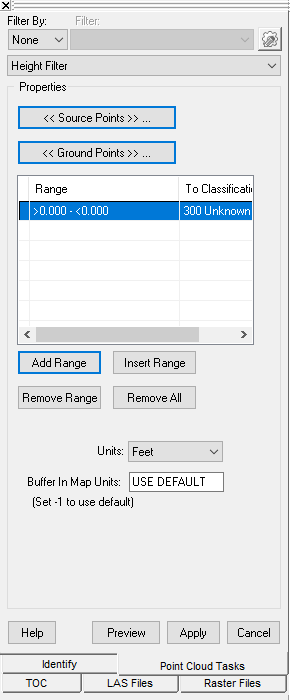
The Height Filter point cloud task is used to classify points that are a vertical distance to a defined surface such as ground. This filter can be useful for classifying points into vertical strata from ground which can then be used in density studies. The Height filter can also be used to locate points that are below a surface which may prove useful in the QA/QC of the LIDAR data.
The Source Points filter defines the set of points that can be matched into the range filters, and thus be modified. The point filter settings can be modified in the Range List using the 'Range' commands. You can modify the source filter parameters within the Live View Point Filter based on Classification, Returns, Point Source ID, Intensity, Elevation, Scan Angle, User Data, GPS Time, and Color.
The Ground Point filter defines the set of points that are used to construct a surface which is used to compute the heights for determining if a point fits within any of the defined range filters. The ground point filter can be modified using the 'Ground Points' command. You may modify the ground filter parameters within the Live View Point Filter based on Classification, Returns, Point Source ID, Intensity, Elevation, Scan Angle, User Data, GPS Time, and Color.
You can create multiple range filters to be run as part of the Height Filter. A new range filter can be added using the Add Range command and settings modified in the Add Range Dialog.
You can add a range filter at a specific location in the Range List by using the Insert Range command. It is important to note that the new range filter will be inserted before the selected range filter. Therefore, the high value of the new filter must follow the rules defined below for an upper range.
Individual range filters can be removed from the Ranges List using the Remove Range button.
All range filters can be removed simultaneously from the Ranges List using the Remove All button.
Edit a range by double-clicking the range in the Range list that you wish to edit.
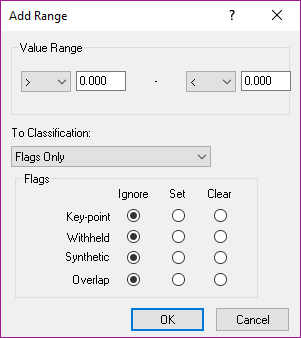
The lower and upper sign for a range filter can be selected from a drop down menus. The lower sign can be greater than, greater than or equal to, or 'Open.' The upper sign can be less than, less than or equal to, or 'Open.'
When selecting 'Open' for the lower sign, it will include all values lower than the high value for this range filter. When using this filter setting, it must be the first filter in the range list.
When selecting 'Open' for the upper sign, it will include all values higher than the low value for this range filter. When using this filter setting, it must be the last filter in the Range list.
When creating or modifying a range filter, you can set the lower or upper value for the range.
For example, in the following range filter >= 10.000 - < 20.000, the lower value is 10 and the upper value is 20. This range filter will include all points that are greater than or equal to 10, but less than 20.
The following rules must be followed for the lower value in order to prevent overlap in ranges:
The following rules must be followed for the upper value in order to prevent overlap in ranges:
Within the Add Range dialog, you can select a specific classification field that defines the class to place points on for a range filter.
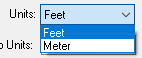
When running the Height Filter you can choose to use feet or meters. Select the measurement unit to use when running the filter from the drop-down menu.
The default block Buffer is 5 times the nominal point spacing. In some cases, such as dense forest, this buffer may be insufficient. Changing the buffer may help to classify the points.