The classification of a LIDAR data point consists of both a classification and a classification flag. The classification flag allows for a point to be simultaneously flagged for particular uses while maintaining the classification of the point. For example, a model key-point can be flagged as such while maintaining the ground classification. Classification flags are used to indicate special characteristics associated with the point[1].
There are currently four flags: Synthetic (0), Key-point (1), Withheld (2) and Overlap (3).
- Bit 0 – Synthetic: If set, this bit indicates that the point was created by a technique other than LIDAR collection, such as digitized from a photogrammetric stereo model or by traversing a waveform.
- Bit 1 – Key-point: If set, this bit indicates that this point is considered to be a model key-point and thus generally should not be withheld in a thinning algorithm.
- Bit 2 – Withheld: If set, this bit indicates that the point should not be included in normal processing. Points that are tagged with this flag are to be retained in the LAS file and included in exports of the LAS file. Withheld is synonymous with “Deleted”.
- Bit 3 – Overlap: If set, this bit (only available with LAS version 1.4) indicates that the point is within the overlap region of two or more flightline swaths. If this bit is used, then all points in the overlap region must have this bit set. Allows for the classification of overlap points to be preserved.
The LAS specification has included this ability to use classification flags since the release of the LAS v1.1 specification. However, the biggest drawback of the initial implementation was that it limited the initial 256 possible classifications available in the v1.0 specification to only thirty-two. With the release of LAS v1.4, the 256 classifications are once again possible using the new point data record formats, six through ten. LAS v1.4 also introduced the concept of the Overlap classification flag.
Software vendors have implemented the user’s ability to use the classification flags in a number of ways. In LP360, a user has the ability to filter based upon the classification flags located within LIDAR data. As well as the ability to set or clear the flags.
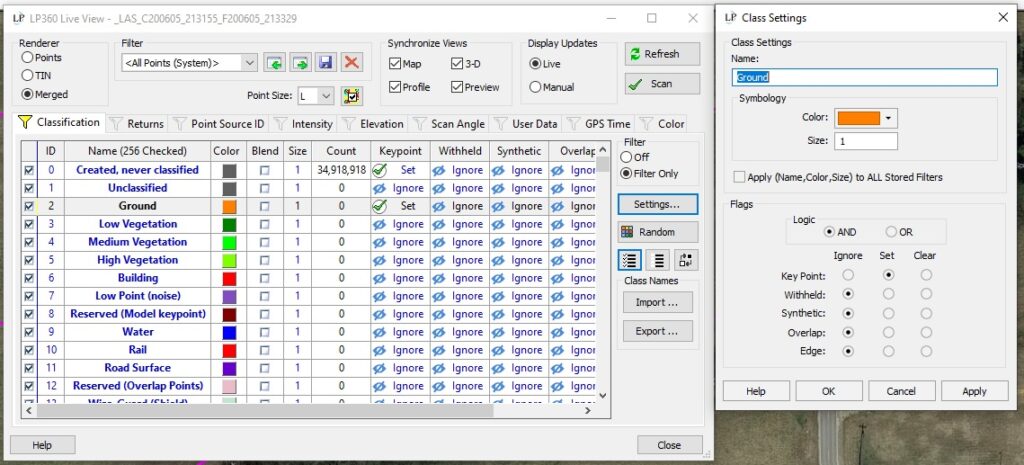
In LP360 version 2019.1 and later, the Live View dialog is used to set display filters and source points filters for both point cloud tasks (PCTs) and manual classification tools.
Setting a Filter Based on Flags for All Points or Multiple Classes
By default, all classes are chosen in the “All Points (System)” filter setting. To set flags for all points, select all class (shortcut: CTRL+a). For setting multiple classes, but not all, left click on a class then hold down the shift or ctrl keys to mutli-select additional classes. The class display should turn blue for all classes chosen and change to light gray when the user clicks off of the dialog. Click the “Settings” button on the right for Class Settings. Set the flags appropriately for the intended selection.
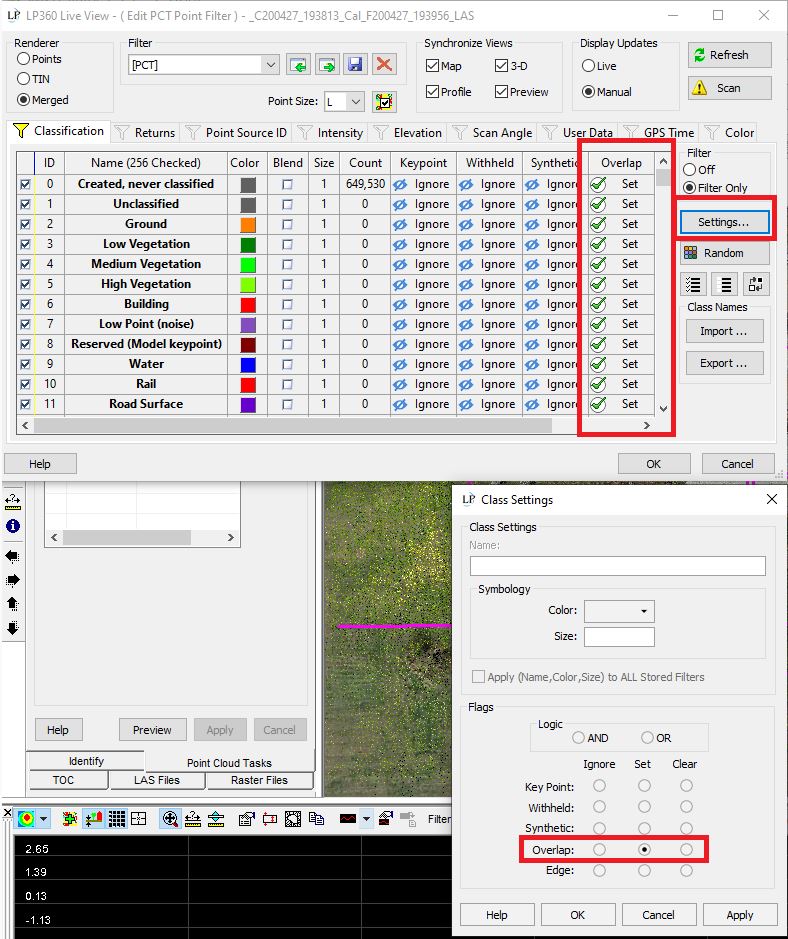
- Ignore – This flag plays no role in the filter
- Set – This flag must be set on a point for it to pass the filter
- Clear – This flag must be clear (not set) on a point for it to pass the filter
Note: The user should keep in mind the logic present in the flag settings. AND logic means that all the selected classification flag settings must be met in order to satisfy the filter. The OR logic allows for any one of the settings to be true. For example, if the setting is AND logic with both the Key Point and Overlap on Set, then a point must have both a Key Point flag AND and an Overlap flag set to true in order to pass the filter, whereas if the logic is OR for the same setting then a point passes the filter if either the Key Point flag OR the Overlap flag is set to true.
Setting a Filter Based on Flags for a Single Class
In the Live View Filter, simply double click in the row for the class that the user wishes to set flags. The same setting options from the previous example are available for this settings as well. Set the flags appropriately for the intended display/selection.
Export Wizard
These classification flags can also be used within the LP360 Export Wizard for filtering the data during the export process.
Set the Model Key Point Flag Using the Model Key Point PCT
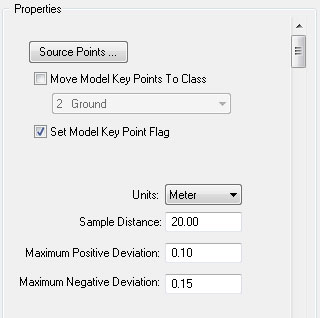
The above processes are based upon classification flags already set within the dataset. LP360 can also be used to set those flags directly. The Model Key-point Filter is a Point Cloud Task designed to apply intelligent thinning to reduce the source point density based upon a surface model error tolerance. During this classification point cloud task, the model key-point flag is set. With older datasets, it was common practice to change the classification of these model key-points to class eight in order to accommodate the available software options at that time. Many datasets with this type of classification likely still exist today.
Set or Clear Classification Flags Using the Basic Filter
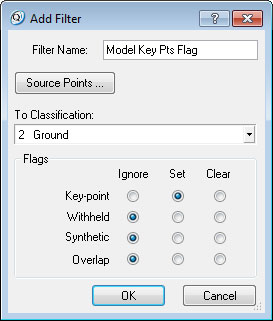
As of LP360, version 2013.2, users have the ability to set or clear classification flags on LIDAR points directly. As an example, if the project consists of one of these legacy datasets which has model key-points that have been classified to class 8 – “Reserved (Model Key Point)”, then one would wish to fix the class and classification flag appropriately. This can be accomplished using the basic filter PCT to flag the points on class 8, and reclassify those points from class 8 to class 2 – “Ground”. This will allow for the ground model to be accurately depicted using a single class, while allowing access to the model key-points for processes requiring a thinned model.
References
Allowing users full access to use and modify both the classification code and classification flag broadens what one may accomplish with a point cloud dataset. In addition, the ability to set, modify and process data using the classification flags greatly assists data providers in creating datasets that meet the various standards used around the world, such as the USGS LIDAR Base Specification.
[1] http://www.asprs.org/a/society/committees/standards/LAS_1_4_r11.pdf – ASPRS LAS Specification Version 1.4 – R11
Deprecated Flag Settings:
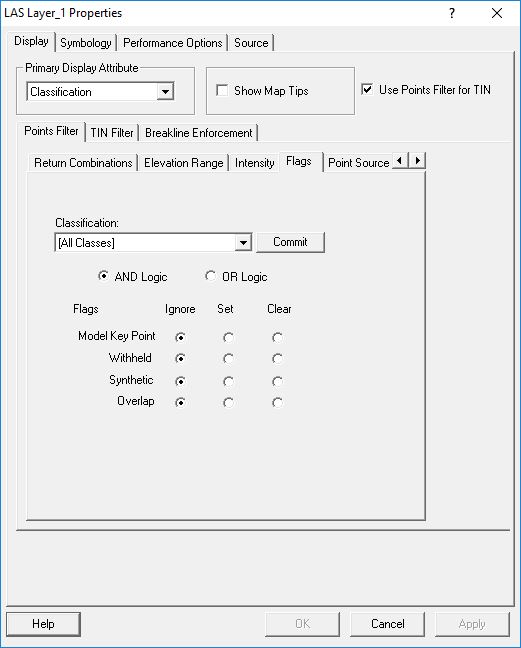
In versions of LP360 prior to 2019.1 flags were located in the LP360 LIDAR Layer Properties, users can filter the display based upon flags within the dataset. In LP360 2015 and later the flags may even be set for only certain classes. For this reason it is important to select the particular class or classes that you wish to also have a particular flag set or clear on and select the commit button to commit the particular desired flag for that class. Note: Until you commit the desired flag the Apply button will not activate if the flags tab is the only modification that you’re making.
