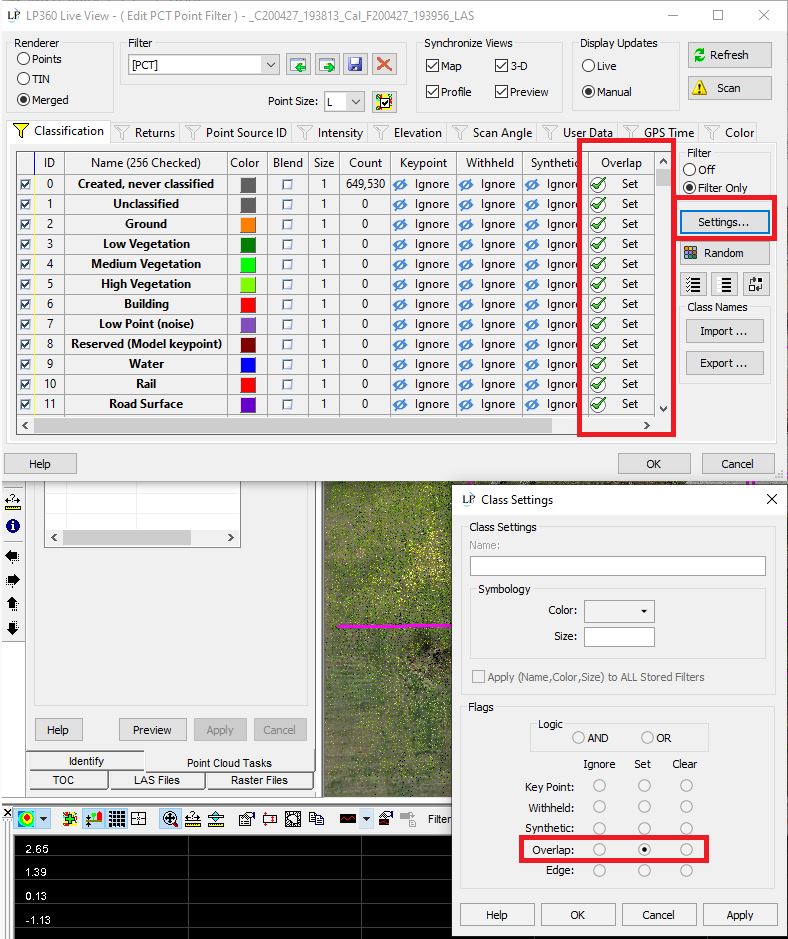
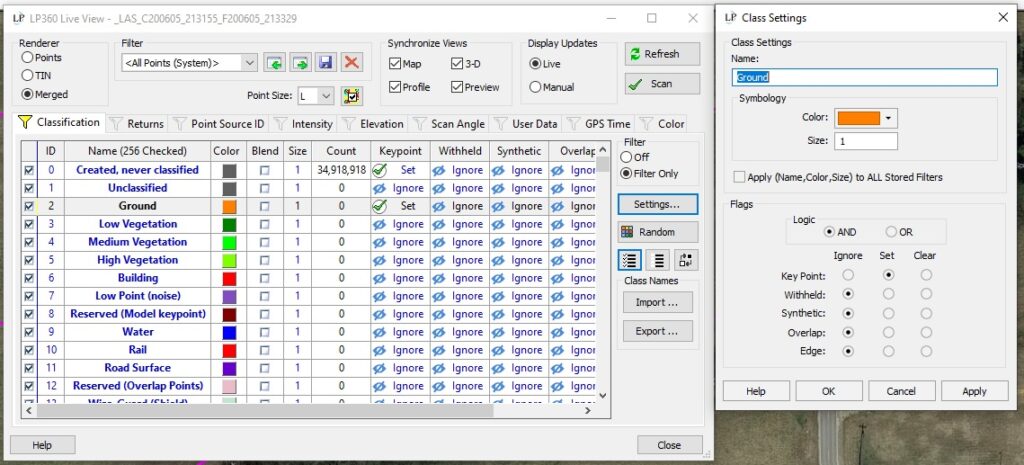
The following is a brief explanation for how to set filters for classification flags in LP360. The Live View Filter allows the user to set flags for: single class, multiple classes, single flag, or multiple flag combination scenarios. For this example, we will review setting the Live View filter for displaying these flags. The same principle applies for setting flags as source points in various LP360 tools and tasks.
Setting flags for all points or multiple classes
To begin, open the Live view filter. By default, all classes are chosen in the “All Points (System)” filter setting. To set flags for all points, select all class (shortcut: control+a). For setting multiple classes (not all), left click on a class then hold down shift or ctrl keys to mutli select additional classes. The class display should turn blue for all classes chosen and change to light gray when the user clicks off of the dialog. Click the “Settings” button on the right for flag settings. Set the flags appropriately for the intended display/selection.
Note: The user should keep in mind the and/or logic present in flag settings. “And” denotes that all chosen classes must be present to display/select. “Or” denotes any combination of classes can be present to display/select.

Setting flags for a single class
In the Live View Filter, simply double click in the row for the class that the user wishes to set flags. The same setting options from the previous example are available for this settings as well. Set the flags appropriately for the intended display/selection.
