When using a Loki and M200 setup, flying with a wired camera is an important detail to geotagging survey photos in ASPSuite. But in order to get successful results, the wires connecting the camera and the Loki need to be connected in a specific manner or else external camera events may not be recorded.
The cable connection needs to look like this:
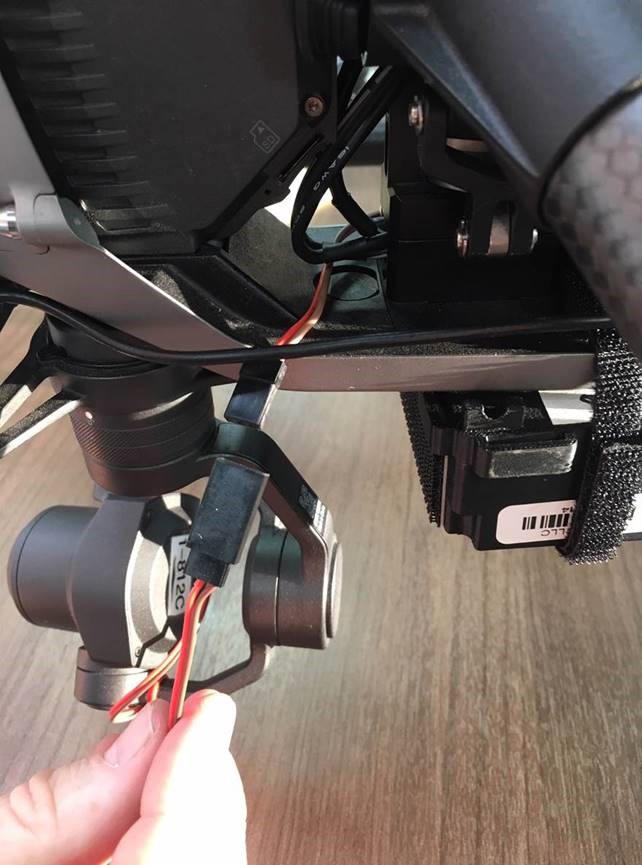
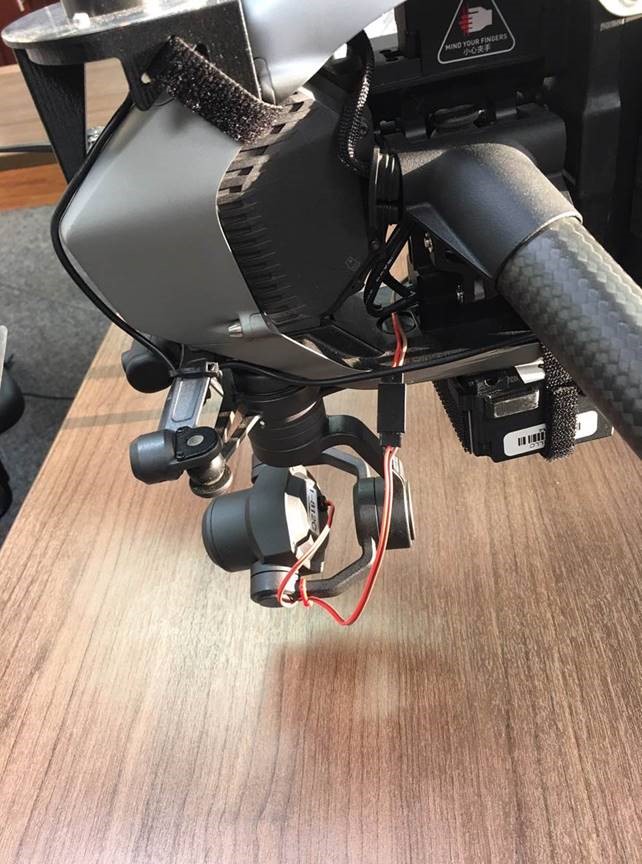
As you can see, the red cable on one side needs to align with the red cable on the other side. Vice versa for the brown cable.
Once you believe you have the camera cables lined up, turn on the drone and let the camera initialize. Then connect the two cables in matching fashion. You can test it by turning on the Loki and wait for it gain a lock on the available satellites. Once this happens and the GNSS light turns green take a few photos before taking off. If the GNSS light blinks every time you press the shutter button, then the Loki has a successful connection to the camera, and the mission can take place.
If you are processing data with this type of connection and ASPSuite fails to find external camera events, check the “.sbf.blocks.txt” file found in the “PPK” folder in the ASPSuite project folder you chose to save your data in. It should look like this:
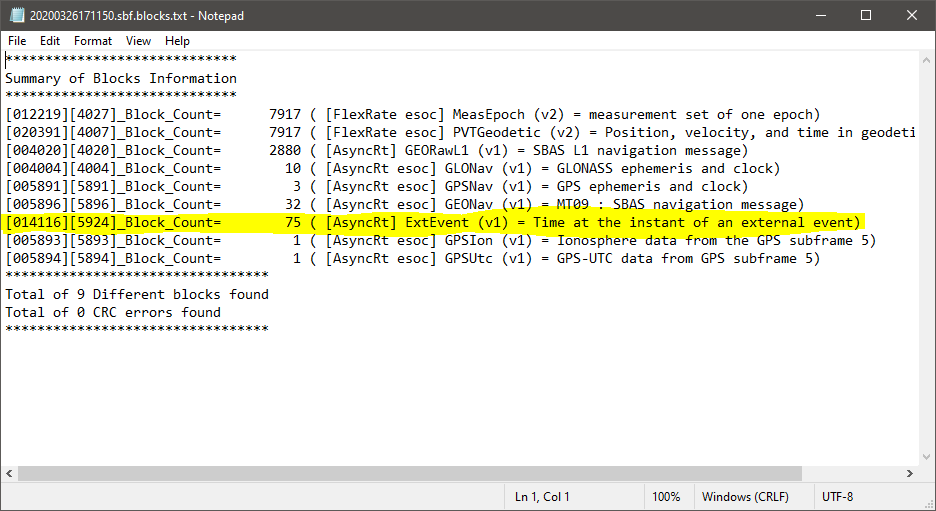
There should be a block (highlighted in the image above) that begins with “# ( [AsyncRt] ExtEvent (v1) = Time at the instant of an external event)”, # representing the number of photos/events planned in the mission. If you do not have this, then there were no events recorded, and that means the cable was not properly connected from the Loki to the camera. This can either mean that the connection was not secured all the way into the Loki port, or that the cable connections were reversed (cable colors not matching at the connection).
