The Tree Segmentation tool can be used on a forested dataset to identify and count the number of trees within an area of interest while also generating two output files: a LAS point cloud to visualize the individual trees and a point feature that contains the height and crown surface area of each tree with its respective tree ID. Before executing this tool, you will need to classify your ground points for your dataset.
This tool is located on the Classification ribbon in LP360 and licensed at the LP360 Advanced or LP360 Drone+Business Intelligence Tools.
Point Filters
The Tree Points Filter is a point filter for the classes the trees will be identified from. The default is class 0 (Created, never classified) and class 1 (unclassified). If the dataset has already been classified for the vegetation classes, this point filter can be modified to include additional classes.
The Ground Points Filter points to the classification ground points (class 2) of your dataset. This is crucial for identifying and measuring the heights of your trees.
Segmentation Parameters
The segmentation parameters must be set to a value greater than 0 to execute the tool. The Average Crown Diameter refers to the average expected diameter of the trees in your area of interest. This diameter can be estimated by measuring the width of tree crowns in the Profile Window. The Average Inter-Tree Distance refers to the average distance expected between trees in a given area. The Minimum Tree Height is the minimum height you expect your trees to be. This parameter is important for separating trees from low (possibly dense) vegetation. As the Medium and High Vegetation classes are characterized as forested vegetation, setting the Min. Heights for these two parameters allows the tool to assign the Classification to every point. Medium and High Vegetation Min. Heights must be greater than the Minimum Tree Height.
Output LAS Layer
The default LAS Layer name will begin with the name of the input LAS followed by Trees_date_time that the tool was executed. You can see this in the Tree Segmentation Dialog figure above. You can also have the option to Append to Existing Layer. The option to set the Output Folder location manually is available to you as well, the default will be your project path.
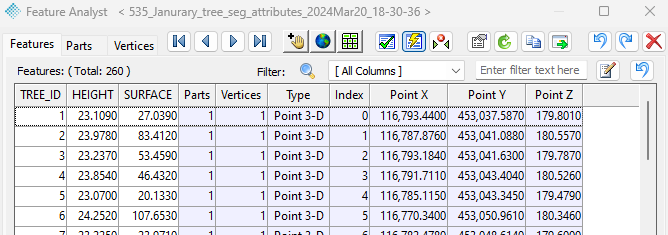
Finally, you have the option to have the Tree Attributes Output Format as a CSV or a shapefile. This attribute file will contain the tree ID, height, surface area, and the XYZ for each identified tree. See the sample attributes shapefile in Feature Analyst below.
This tool can be executed either using Extent the Active LAS Layer or by the Filter with Feature Layer option which would allow you to execute by regional boundaries (example: plot boundaries). If you choose to execute the tool using a feature layer for the Area Selection, the feature layer will need to be created or added to the project before opening the Tree Segmentation dialog.
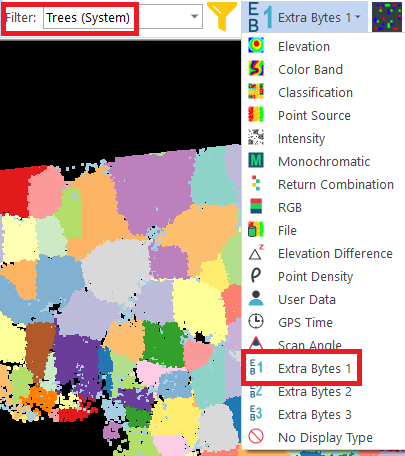
After you have executed the tool and you are ready to view your new LAS layer, you will need to set the Filter (found on the Navigation Toolbar) to Trees (System) and change the Display option to Extra Byte 1. See the screenshot below.
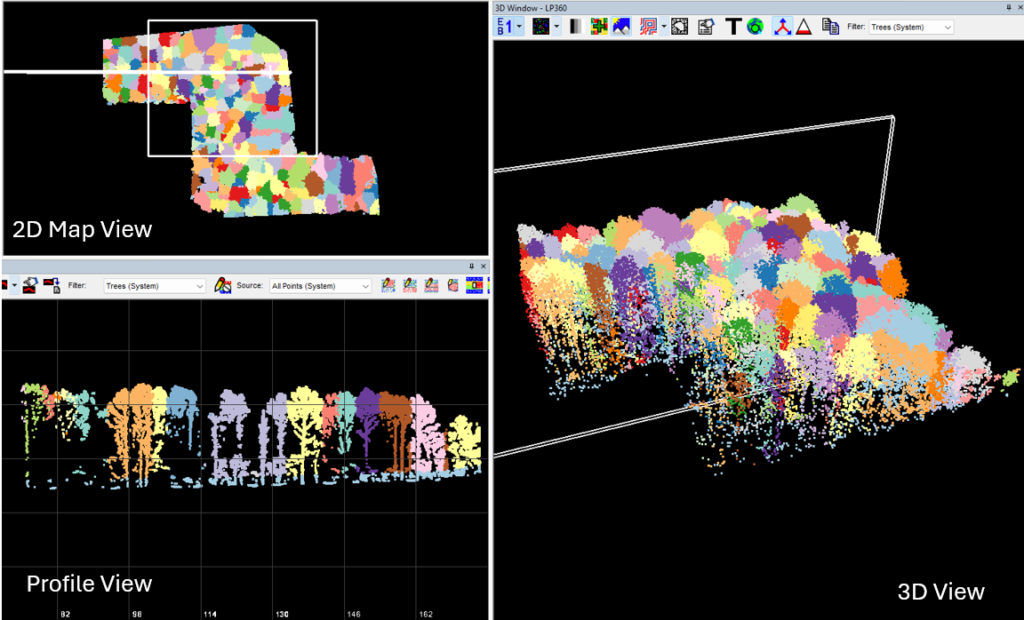
After you have set the Filter and changed the Display for your new generated LAS layer, you should then see something similar to the figure below.
Watch the tutorial on Maximize Forest/Orchard Management with LP360’s New Individual Tree Segmentation Tool for more information.


