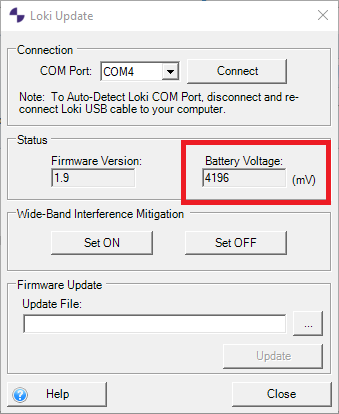
The following steps describe the process for checking your Loki battery voltage.
- Connect Loki to your computer using the supplied USB-C cable
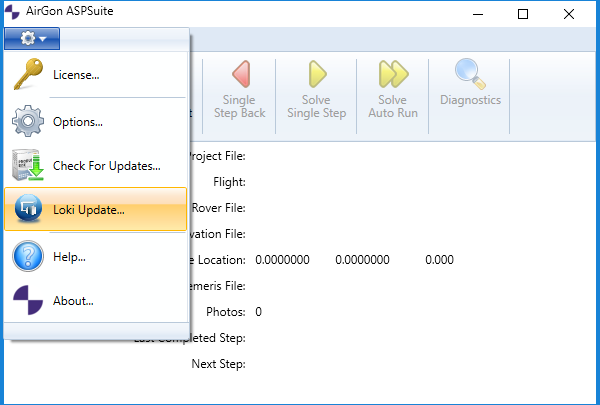
- Open ASPSuite
- Click the gear icon
- Select “Loki Update”
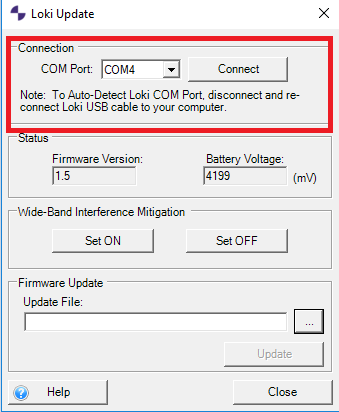
- Select the COM port from the drop down menu and click connect. (To auto-detect Loki on the COM Port, disconnect and re-connect the Loki USB cable to your computer.)
- When you have successfully connected to Loki, your battery voltage will be displayed in the Status section.