Using Different Geoids in ASP Suite
Note: This workflow is experimental. If any issues are encountered using this workflow, please contact AirGon support.
Users can load additional Geiods to the ASP Suite.
- The file must be in .gtx format. You can convert those files with VDATUM. Here is a link to this: https://vdatum.noaa.gov/download_agreement.php
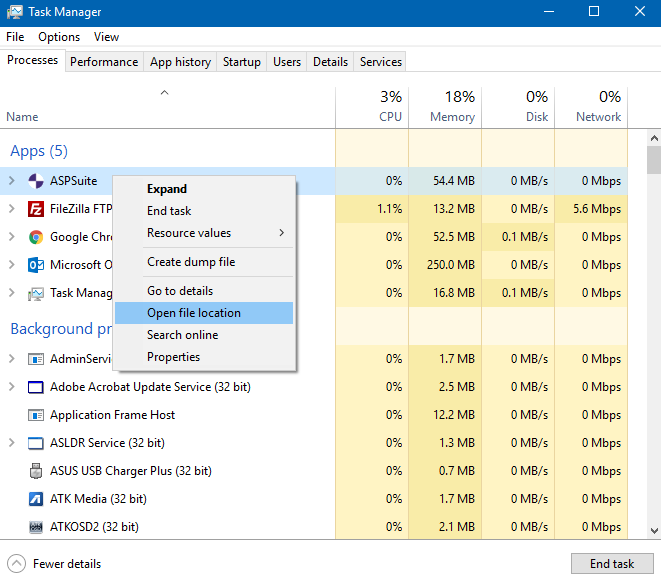
- Find out the location of default ASP Suite geoids on the local computer. Open task manager and right click on the ASP Suite. Click on Open File Location.
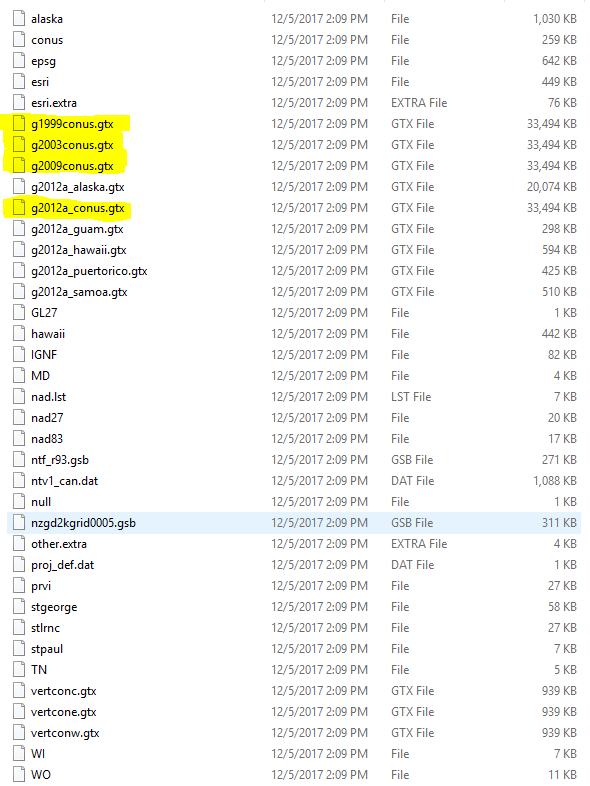
- Open the folder Others=>proj=>proj-data. There should be multiple .gtx geoid files here. Choose one of the highlighted files to replace. When replacing a geoid file, make sure that the file name for the replacement file is exactly the same as one of these files. Make sure to save the file that you are replacing in another location, so that you can reload it later.
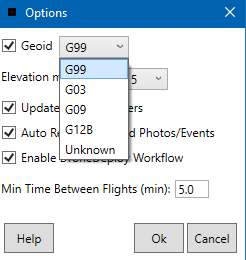
- After replacing this file, choose the corresponding geoid in the ASP Suite that was replaced. For example, if g1999conus.gtx has been replaced, choose G99 to use the newly loaded geoid file.
- The new geoid file should now be enforced in ASP Suite processing.
- Geoid files will be overwritten when ASPSuite is updated so this process will need to be performed after each update.
Note: This workflow is experimental. If any issues are encountered using this workflow, please contact AirGon support.
