The GeoCue workflow management software has the ability to Export Geometry and attributes from entities on any layer to a shapefile. Users may configure which attributes of the entity export with the geometry by configuring the applicable attributes, attribute groups and entities in Environment Builder. For example, users often wish to create geometry from the LIDAR Source entities that represent the swaths or flight lines. When doing so they wish to include the start and end time, however, by default, those attributes belong to an attribute group that is not enabled for export.
Configure Attributes to Export
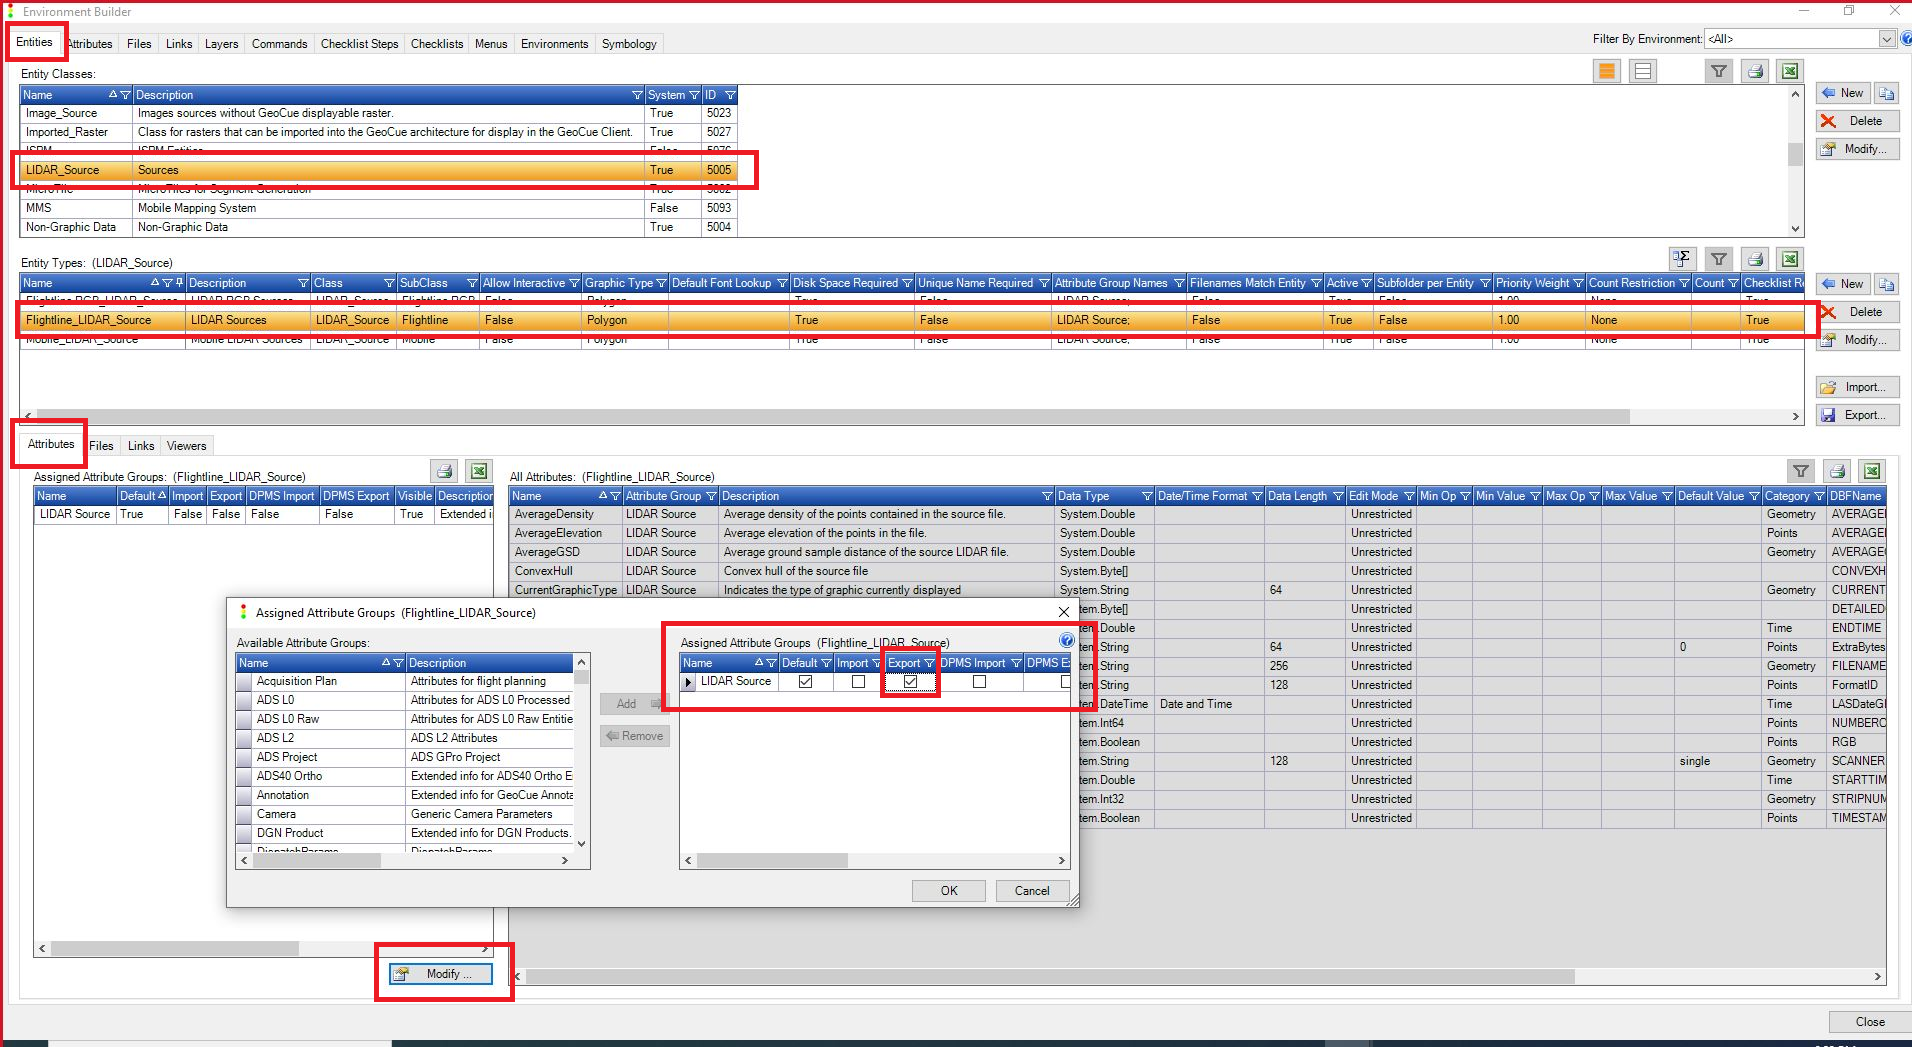
Whether an attribute gets exported is primarily controlled by the Export flag on the attribute group assigned to the entity as defined by your GeoCue Environment Builder. For our example LIDAR Source Entity, Figure 1 shows where the setting is located (Environment Builder -> Entities -> LIDAR_Source -> Flightline_LIDAR_Source -> Attributes -> LIDAR Source -> Modify -> Export) to enable the additional LIDAR Source attribute group containing the start and end time attributes when to the exported geometry.
Configuring Attribute Groups
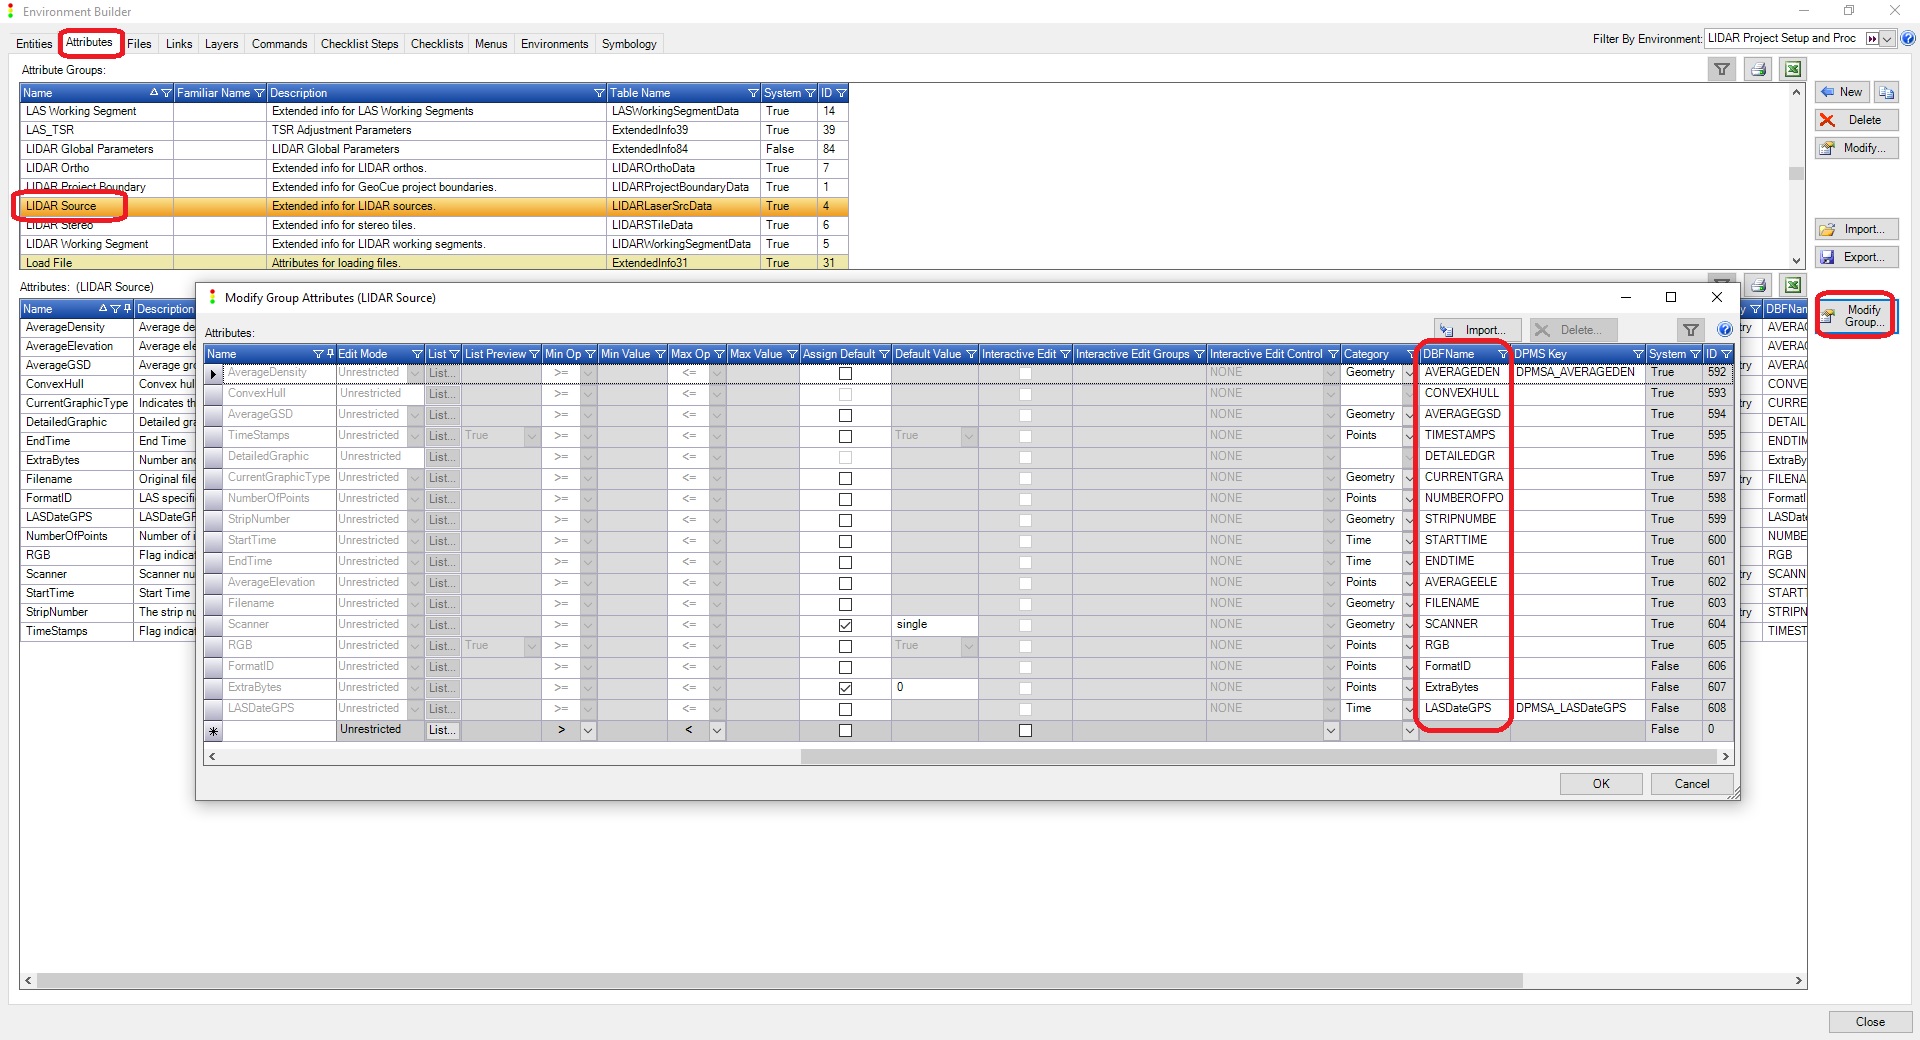
When the attribute group on an entity is enabled the attributes will be exported to the DBFName as defined on the attribute group itself. For our example LIDAR Source Entity, Figure 2 shows where the setting is located (Environment Builder -> Attributes -> LIDAR_Source ->Modify Group -> DBFName).
Using the Export Geometry Tool
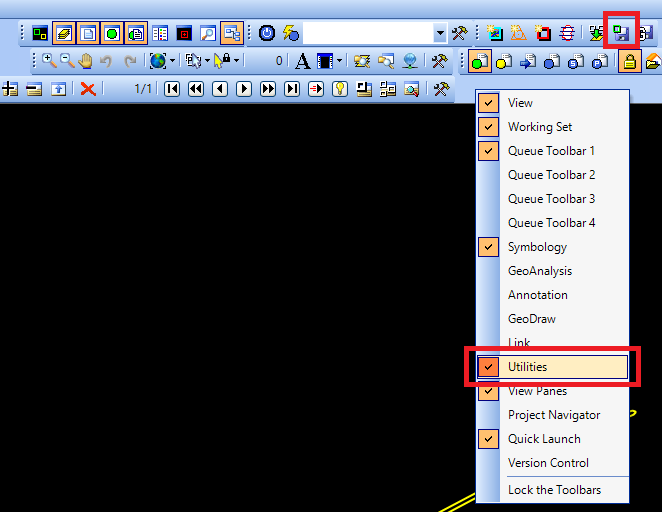
Export Geometry is found on the GeoCue Client Utilities toolbar. Enable the utilities toolbar by right-clicking in the blank space above the map view in the GeoCue Client and placing a checkmark beside the Utilities toolbar (Figure 3).
- In the Table of Contents (TOC), select the layer containing the entities to be exported.
- Select Export Geometry from the Utilities toolbar.
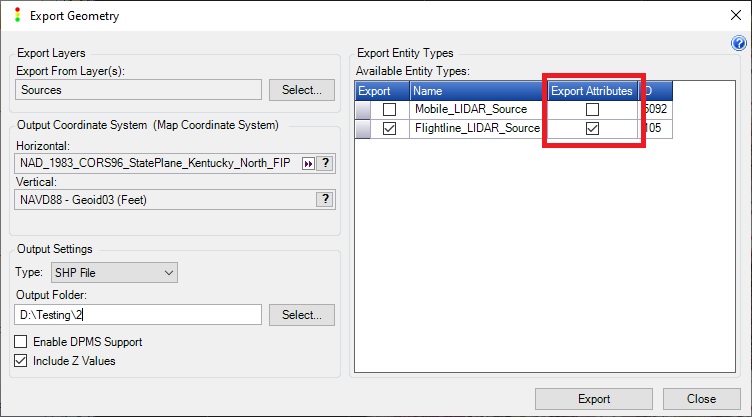
- Check the box to Export Attributes for the desired entity type.
- Set the desired Output Settings.
- Export.