Agisoft’s Metashape (formerly Photoscan) has capabilities for editing orthomosaics. One function is to assign only user selected images for a specific area. This is useful for cleaning up areas of the ortho that have: blurriness, moving vehicles, bad image stitching, etc. Created polygons can also be used for defining a subset of the project area for export.
Prerequesites
Before one can begin editing an orthomosaic, the workflow must be completed in Metashape through to having run Build Orthomosaic.
With True View EVO workflows for both 3DIS and 2DIS, including guest sensors, this is done by utilizing Metashape for EVO (MfE).
- Run MfE as usual following the guidance in the Metashape for EVO (MfE) section of the True View EVO Users Guide.
- Then, when the MfE job has completed, open Job Manager, select the MfE job you wish to edit, and select File Explorer to open the job location in Windows File Explorer.
- Browse in the Metashape subfolder. You may have one or two subfolders under there with a datetime stamp at the end of the folder name, for example “211021_112921_MFE_20211021T0629”. You want the second one if there are two. Located therein is the Metashape Project file (psx).
- In Metashape, open the Metashape Project file (psx).
Editing Orthomosaics
- To begin, make sure that you have selected to view the orthomosaic and are viewing the Ortho, not the Model tab.
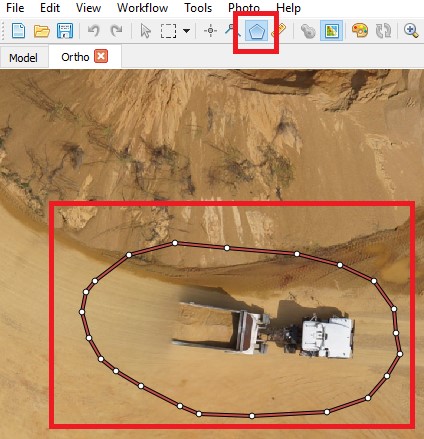
- Draw a polygon around the area in the orthomosaic that has issues. Use the Draw Polygon tool that is located in the toolbar (Figure 2) under the Draw Polyline tool.
- Left click around the area that needs to be edited and double click to finish. (Figure 3)
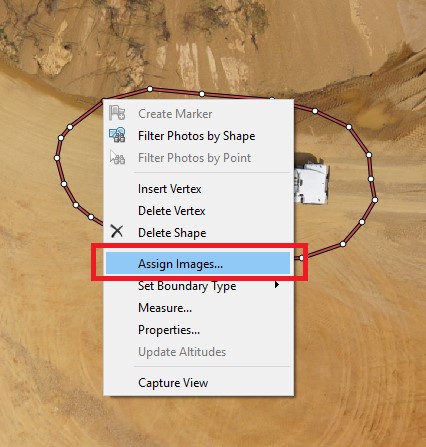
- Right-click on the polygon and choose Assign Images. (Figure 4)
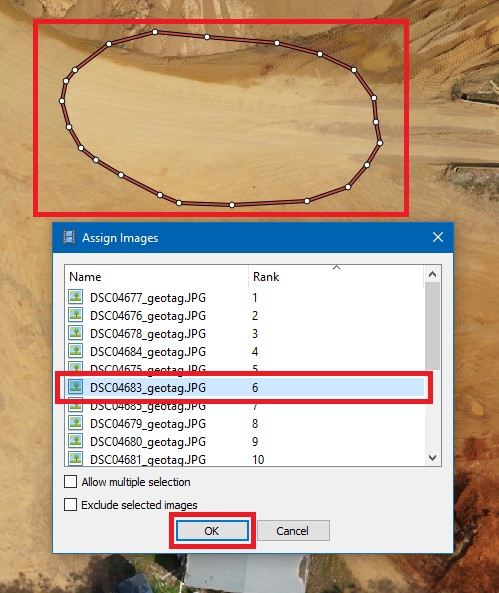
- Concerning replacement imagery for the chosen area, a single photo or multiple photos can be assigned or excluded. When you select an available photo in the Assign Images window, the imagery will change in the polygon area. Choose photo(s) that change the area to the desired appearance. When finished, select OK. (Figure 5)
- To enforce the changes that you have selected for the ortho, you must update the orthomosaic after assigning the images in a chosen area. Click on the Update Orthomosaic button. This button will only be highlighted once you have assigned images. (Figure 6)


- After pressing this button and accepting the changes, it will become grayed out once more. The orthomosiac should now reflect the changes that you have selected in the Metashape orthomosiac window and export.
Defining the Project Area
- To begin, draw a polygon around the area to be used as the boundary extents for orthomosaic export. Use the Draw Polygon tool that is located in the toolbar. Left click around the area that needs to be edited and double click to finish (Figure 7).
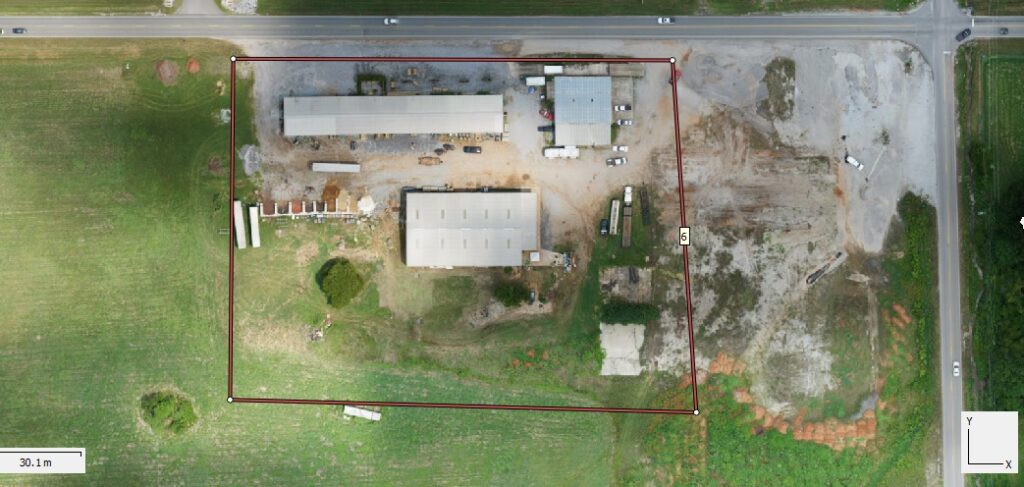
- Select the created polygon and right click on it. Choose Set Boundary Type -> Outer Boundary (Figure 8).
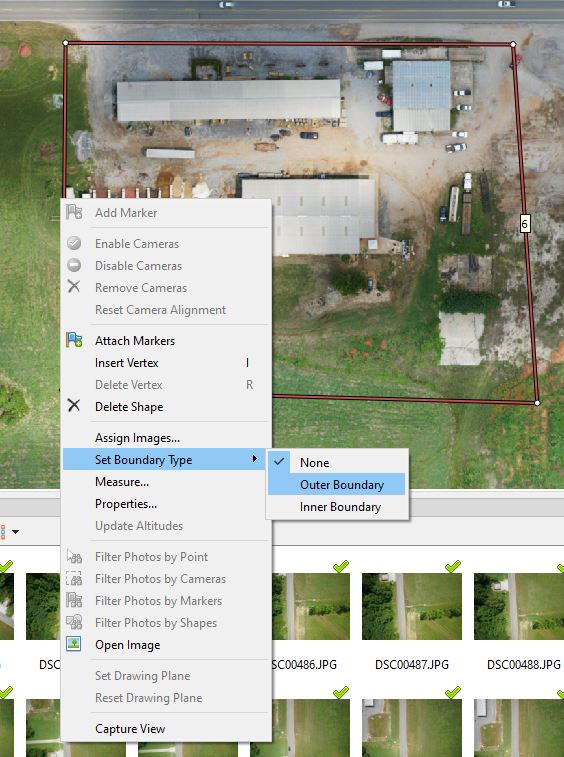
- The ortho boundary will now reflect the chosen polygon shape as the extent of the exported raster.
Post Edits
- Export the edited orthomosaic from Metashape (File -> Export -> Export Orthomosaic -> Export JPEG/TIFF/PNG…).
- Set your desired settings for the orthomosaic. This is what typically matches the MfE defaults. Of course your SRS will vary from project to project.
- Select “Export…” to generate the updated orthomosaic.


