
This guide provides step-by-step instructions to securely mount TrueView sensors to the Harris H6 drone, including payload, damping, and antenna installation. Follow these steps to ensure optimal performance and safety.
H6 models
The Harris H6 has two main models, which will affect where your payload is mounted. The electric model is center-mounted, while the hybrid EFI is front-mounted.
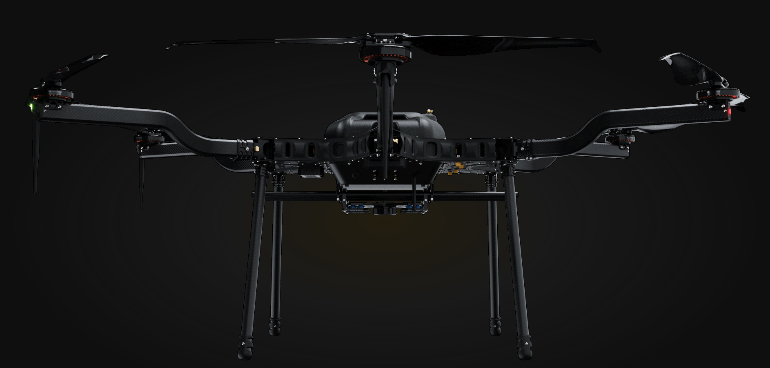
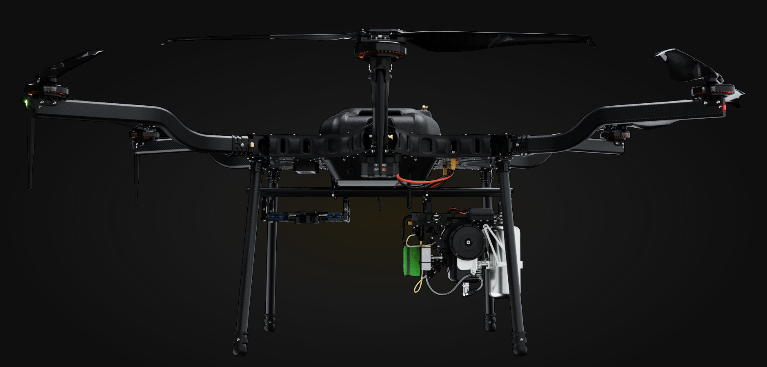
Smart dovetail adapter
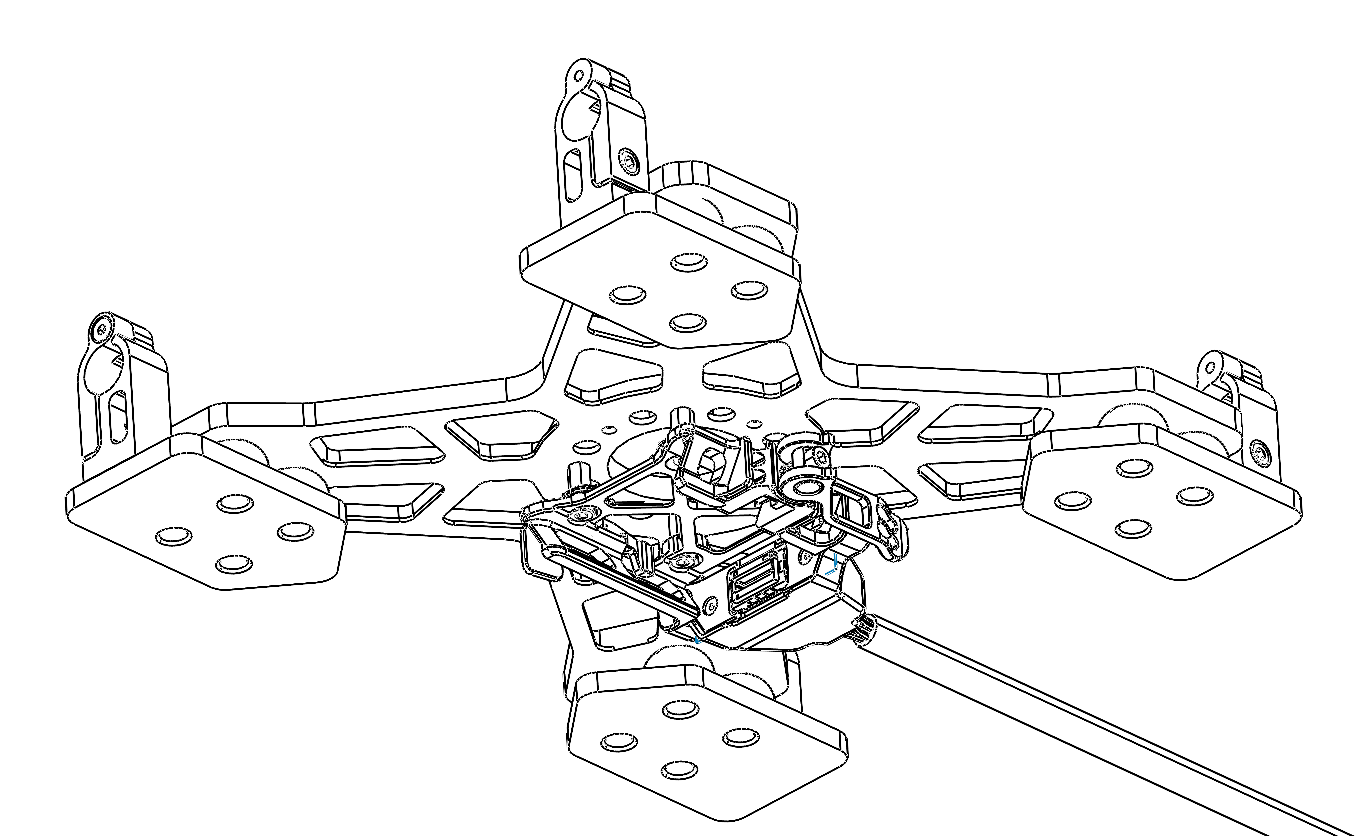
| Part number : MNT1002267A00T (Antenna mount included in this kit) |
Payload compatibility
The Trueview smart dovetail adapter is compatible with all TrueView payloads equipped with smart dovetail.
Included components
- Trueview smart dovetail adapter
- Harris H6 Antenna mount
- Antenna (included with payload)
- Coaxial cable SMB straight jack (female) to SMA straight Jack (female), with antenna disconnect
- M3 x 10mm socket head screws (2)
- Smart dovetail power cable
Required parts
- 16mm tubemount clamps for Harris H6/Hx8 drones (4) (provided by Harris)
Required tools
- 2.5mm hex screwdriver
- 243 Medium Strength Tread Locker (Loctite)
Adapter Installation (H6 Electric)
1. Slide the adapter onto the 16mm tubemounts on the Harris H6.
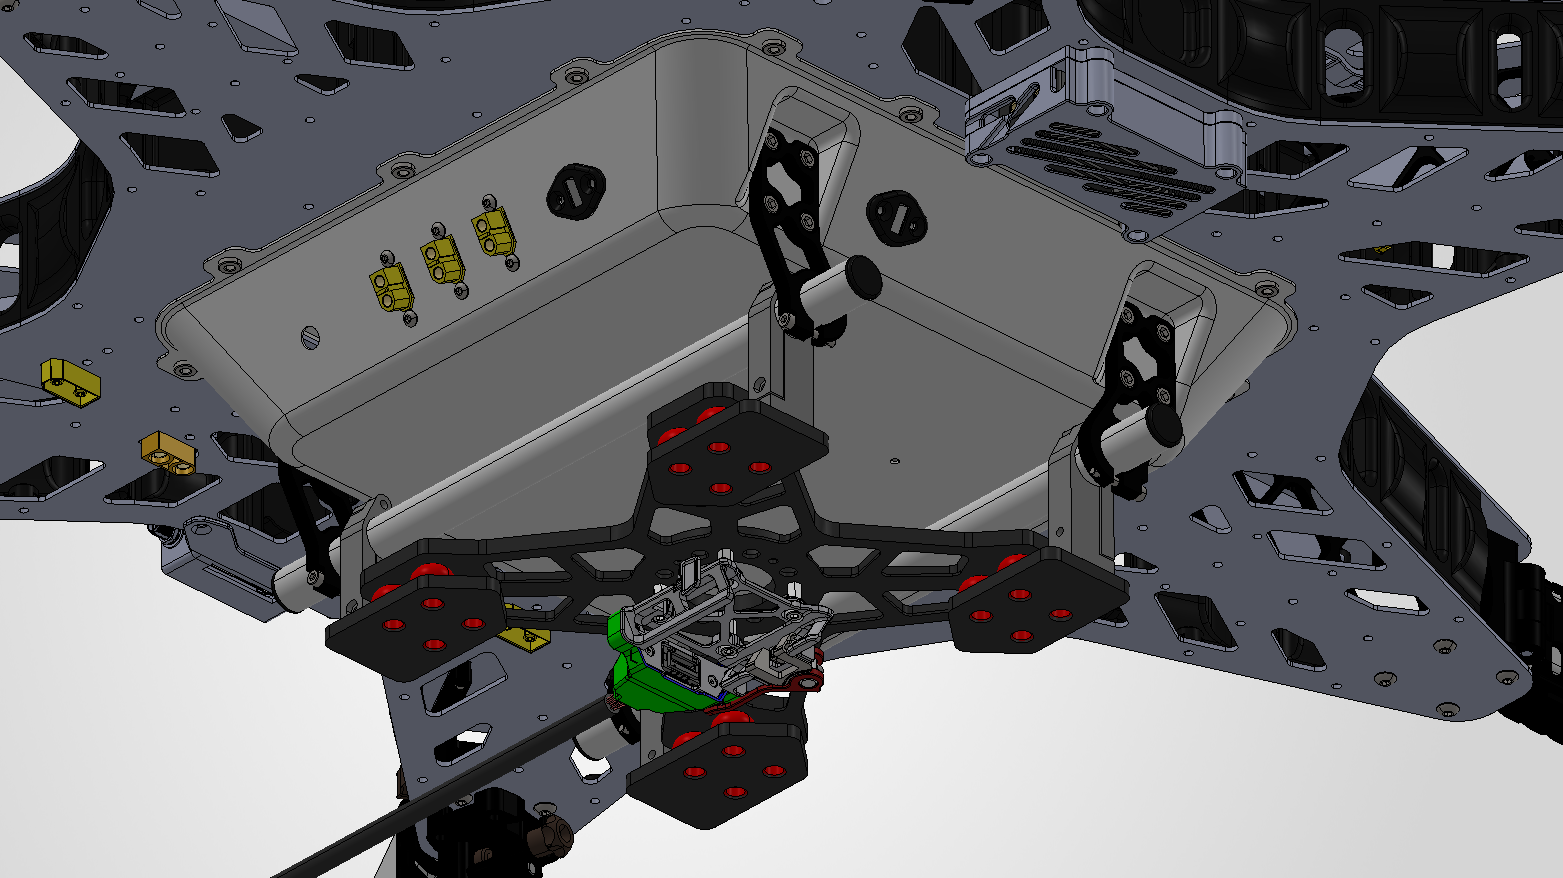
2. Position the adapter so the tube mount clamps are equally spaced on each side (7mm each). Secures the screws with Loctite.
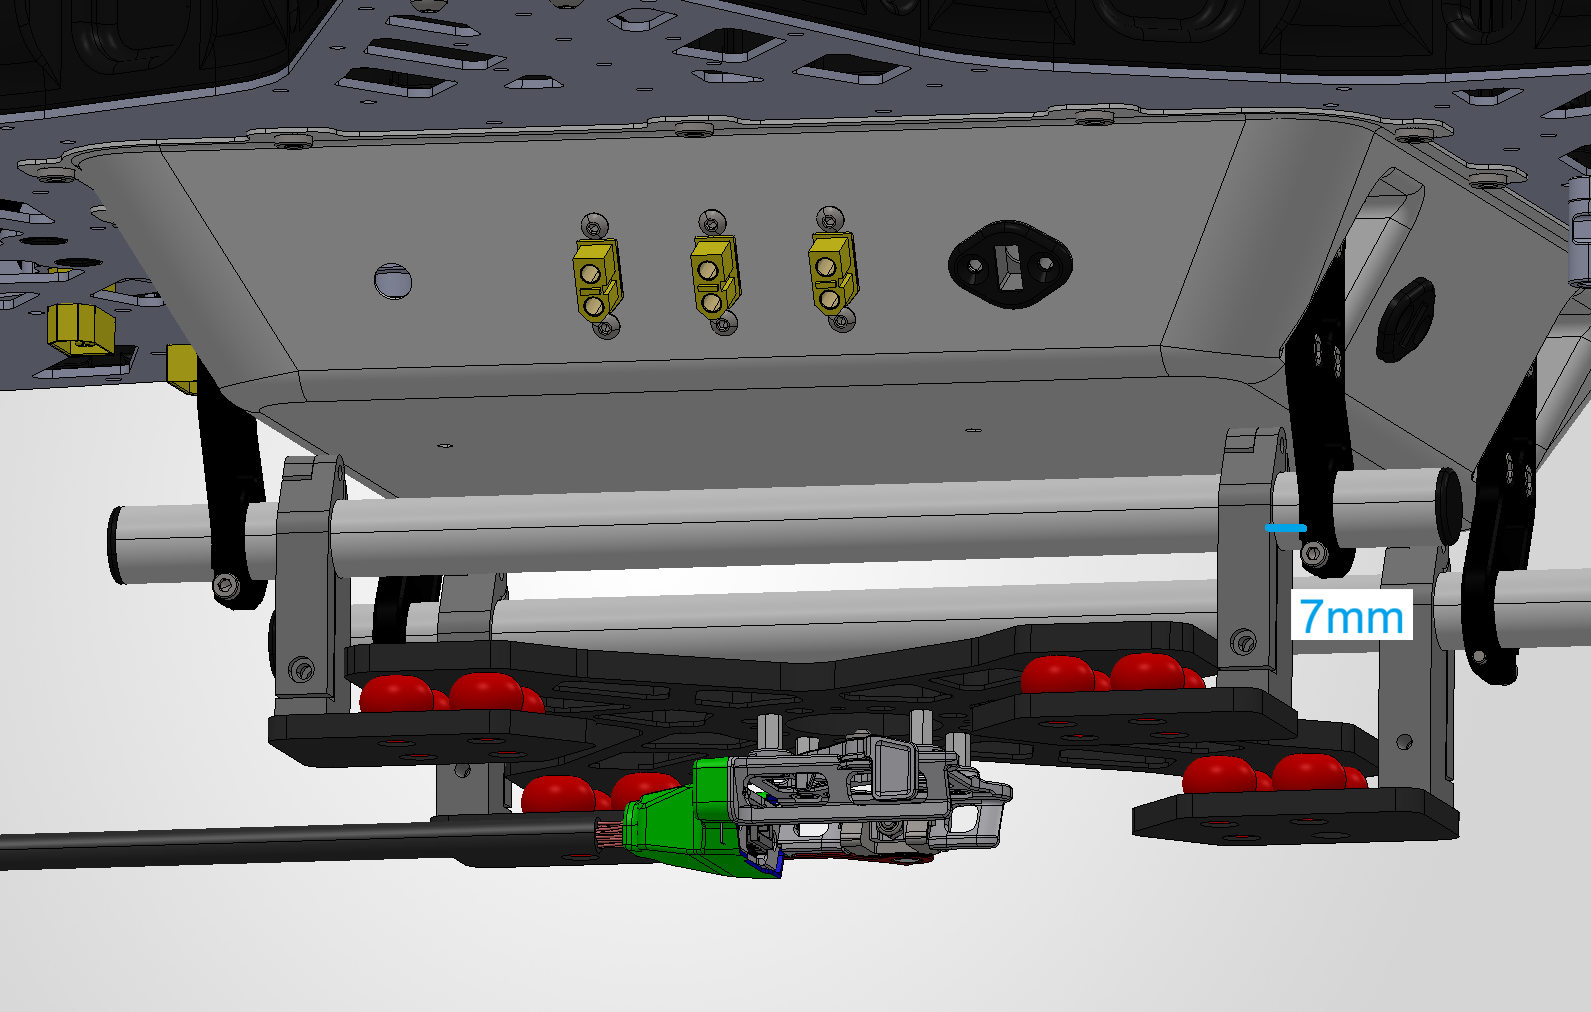
3. Plug the smart dovetail power cable (see Payload power section).
| Part number : MNT1002267A00T (Antenna mount included in this kit) |
Payload compatibility
The Trueview smart dovetail adapter is compatible with all TrueView payloads equipped with smart dovetail.
Included components
- Trueview smart dovetail adapter
- Harris H6 Antenna mount
- Antenna (included with payload)
- Coaxial cable SMB straight jack (female) to SMA straight Jack (female), with antenna disconnect
- M3 x 10mm socket head screws (2)
- Smart dovetail power cable
Required parts
- 16mm tubemount clamps for Harris H6/Hx8 drones (4) (provided by Harris)
Required tools
- 2.5mm hex screwdriver
- 243 Medium Strength Tread Locker (Loctite)
Adapter Installation (H6 Hybrid)
1. Slide the adapter onto the 16mm tubemounts on the Harris H6.
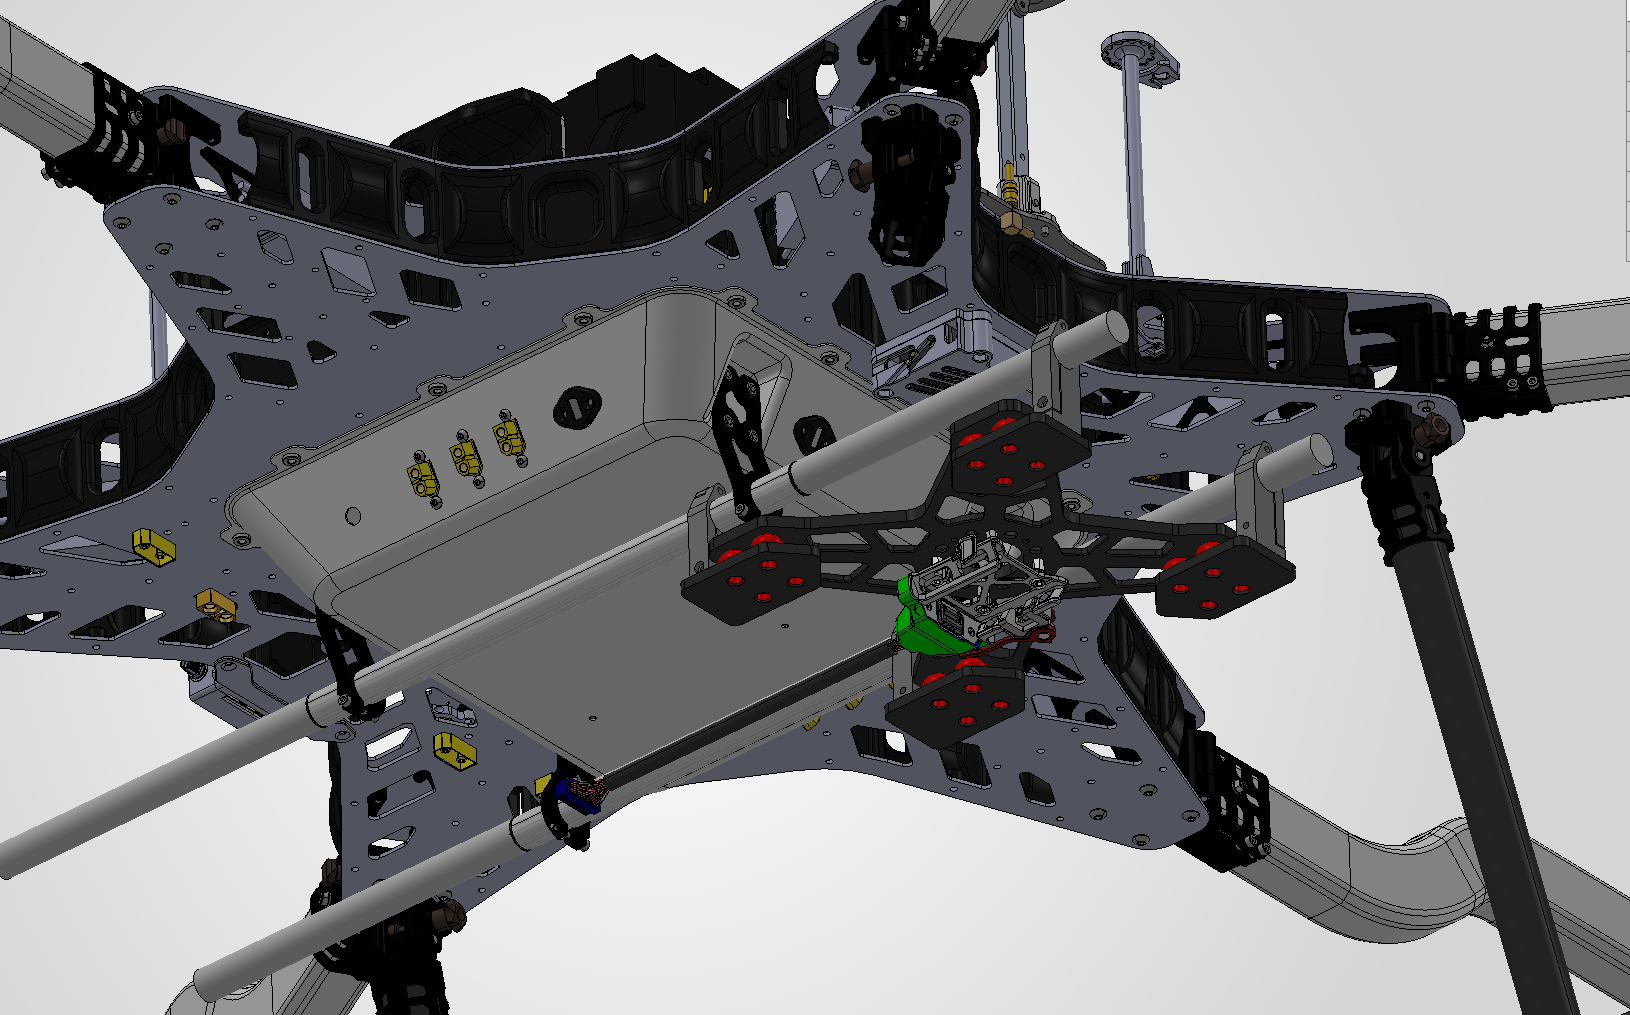
2. Position the adapter so the back tube mount clamps is 18.5mm behind the drone’s tube holder. Secures the screws with Loctite.
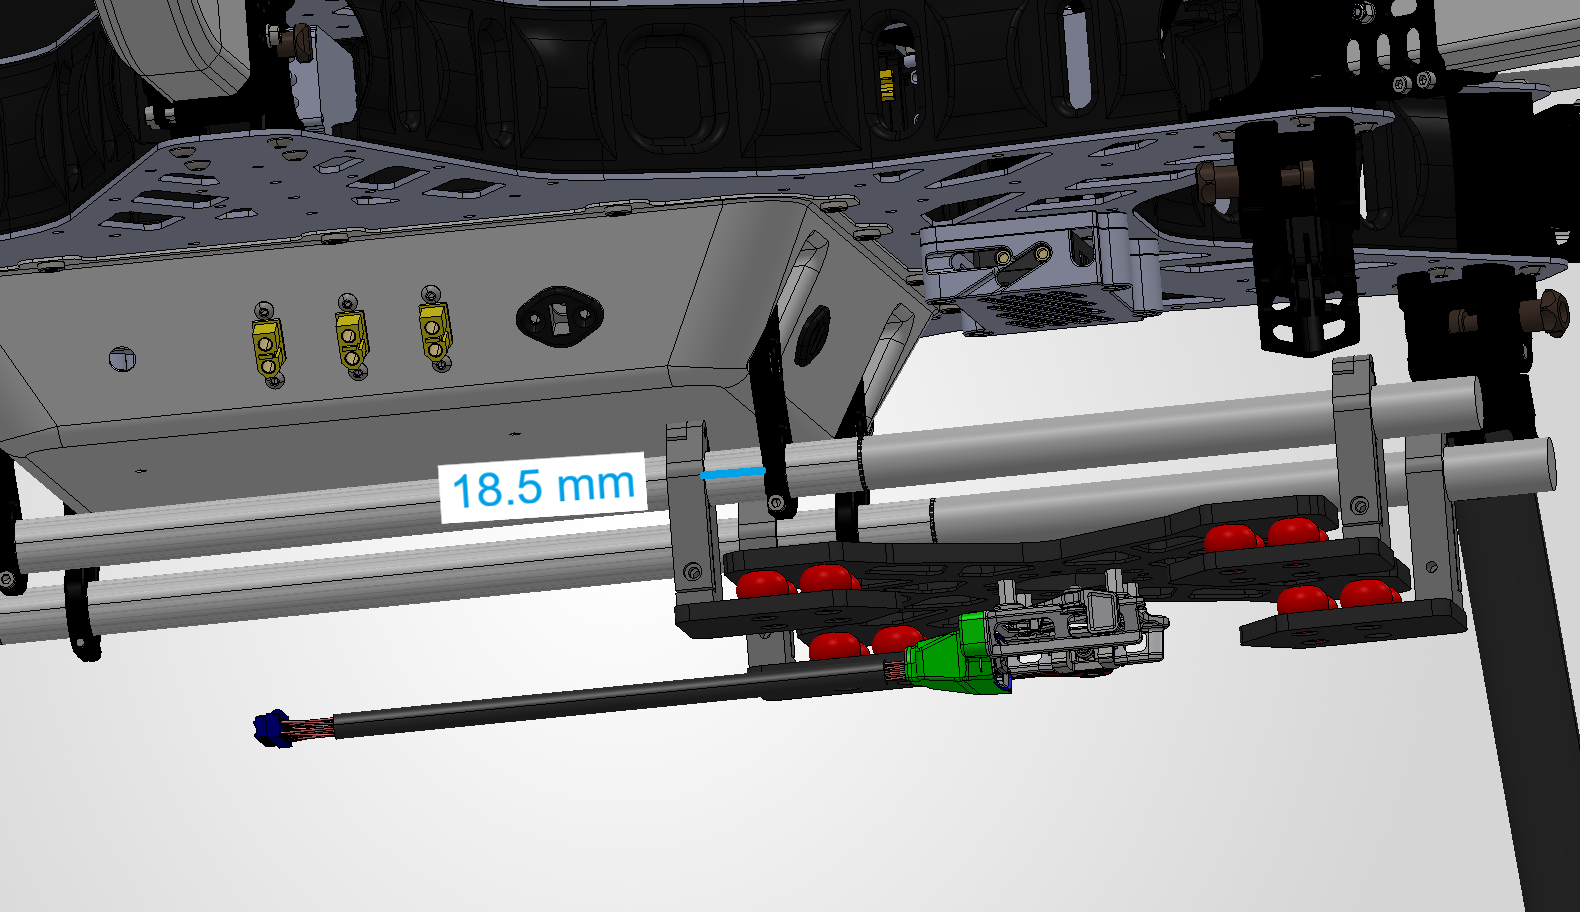
3. Plug the smart dovetail power cable (see Payload power section).
PLI Payload adapter
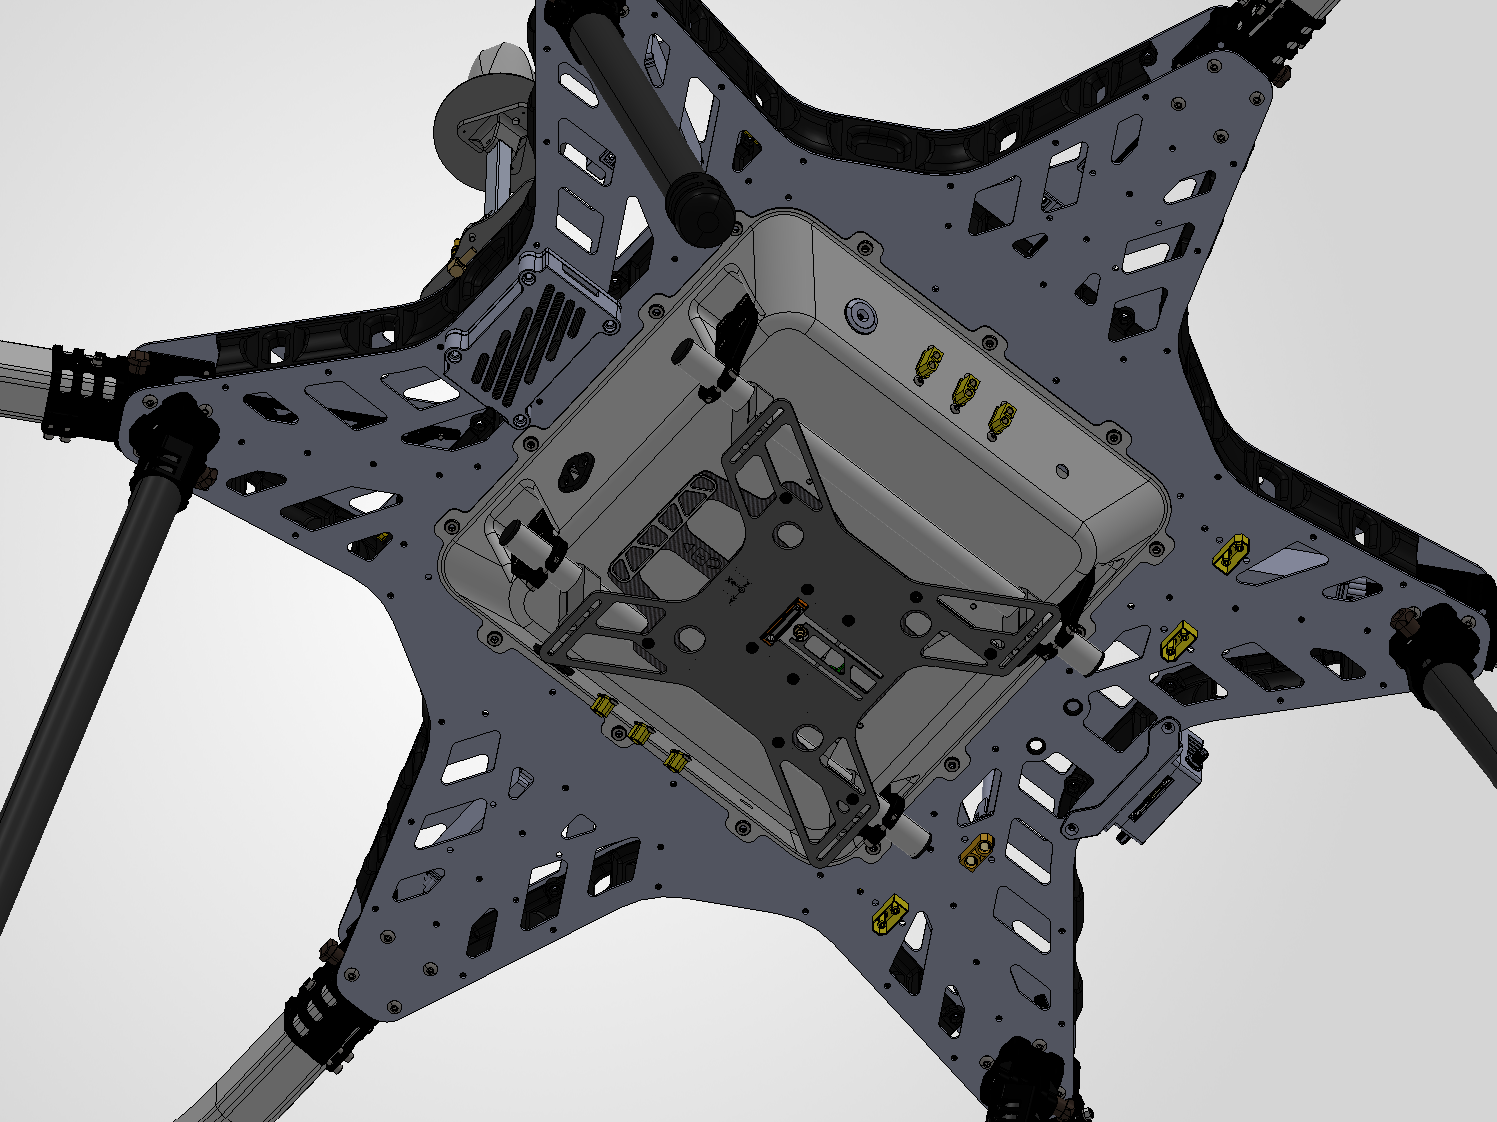
| Part number : FTV1001506A00T (Antenna mount included in this kit) |
Payload compatibility
All Trueview payloads equipped with a PLI-type adapter (4 pegs).
Included components
- Front Handle Payload Interface (PLI) mount
- Harris H6 Antenna mount
- Antenna (included with payload)
- Coaxial cable SMB straight jack (female) to SMA straight Jack (female), with antenna disconnect
- PLI power cable
- M3 x 10mm socket head screws (2)
- 10″ steel safety wire
Required parts
- 16mm tubemount clamps for Harris H6/Hx8 drones (4) (provided by Harris)
Required tools
- 2.5mm hex screwdriver
- 243 Medium Strength Tread Locker (Loctite)
Installing the Payload Adapter
The following steps summarize how to integrate the drone side payload interface:
1. Remove the Gremsy Dampening Plate but leave the clamps attached to the rails.
2. Add Loctite to screws and mount the PLI Plate to the Clamps using (8) M3x6 socket head screws
and (8) M3 Washers.
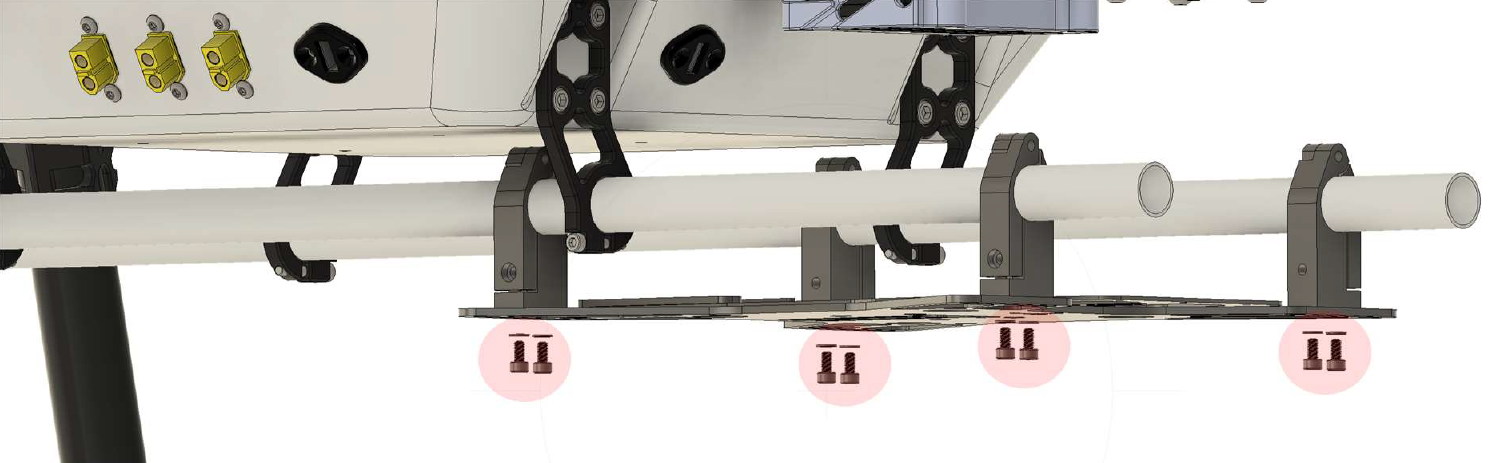
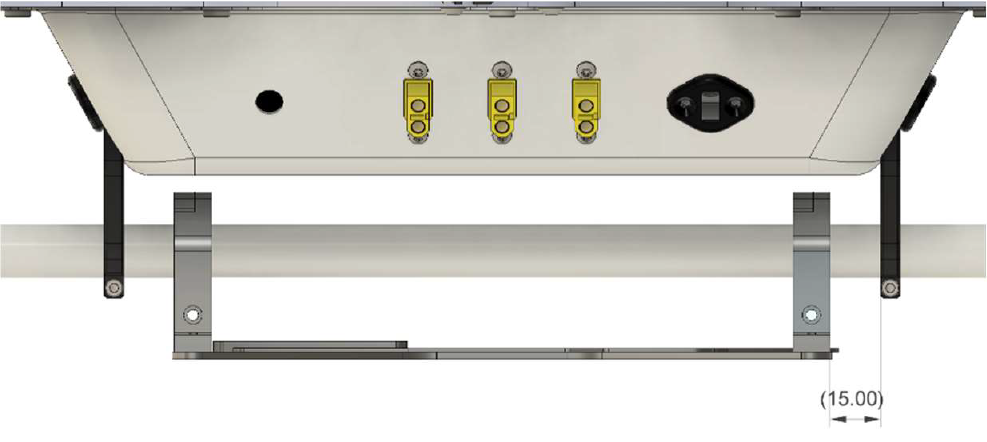
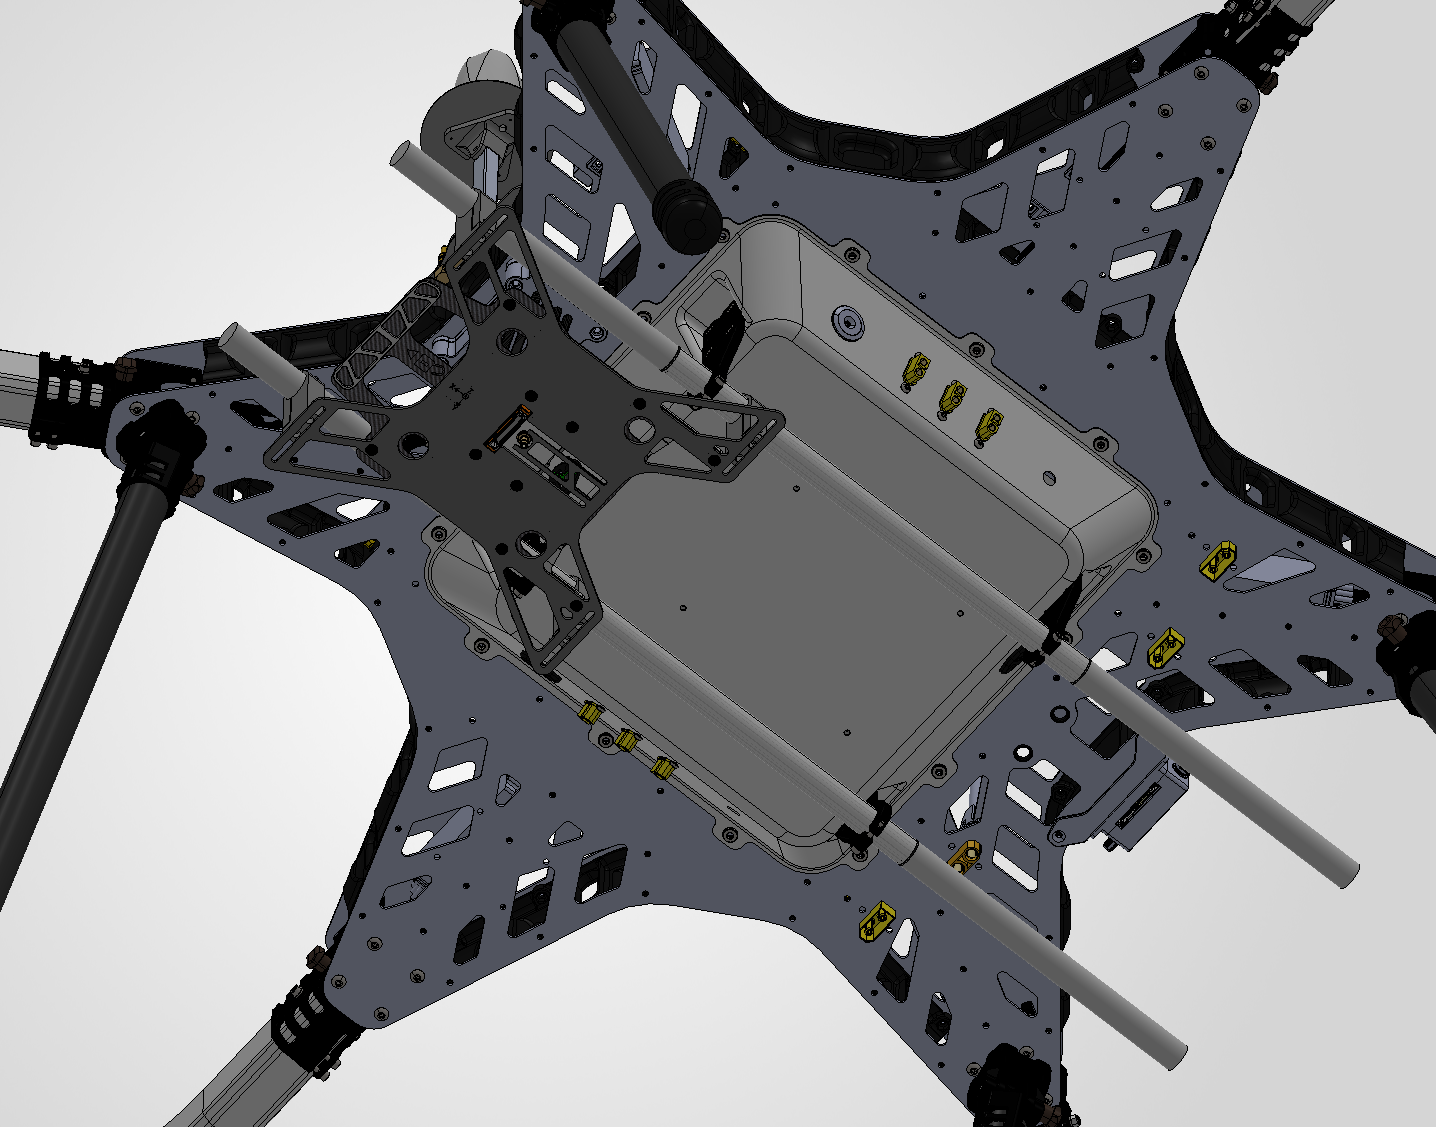
3. Position the PLI plate using the measurements shown. Note H6 Electric and Hybrid have different
placements. H6 Electric is centered on rails (15mm from either rail brace).
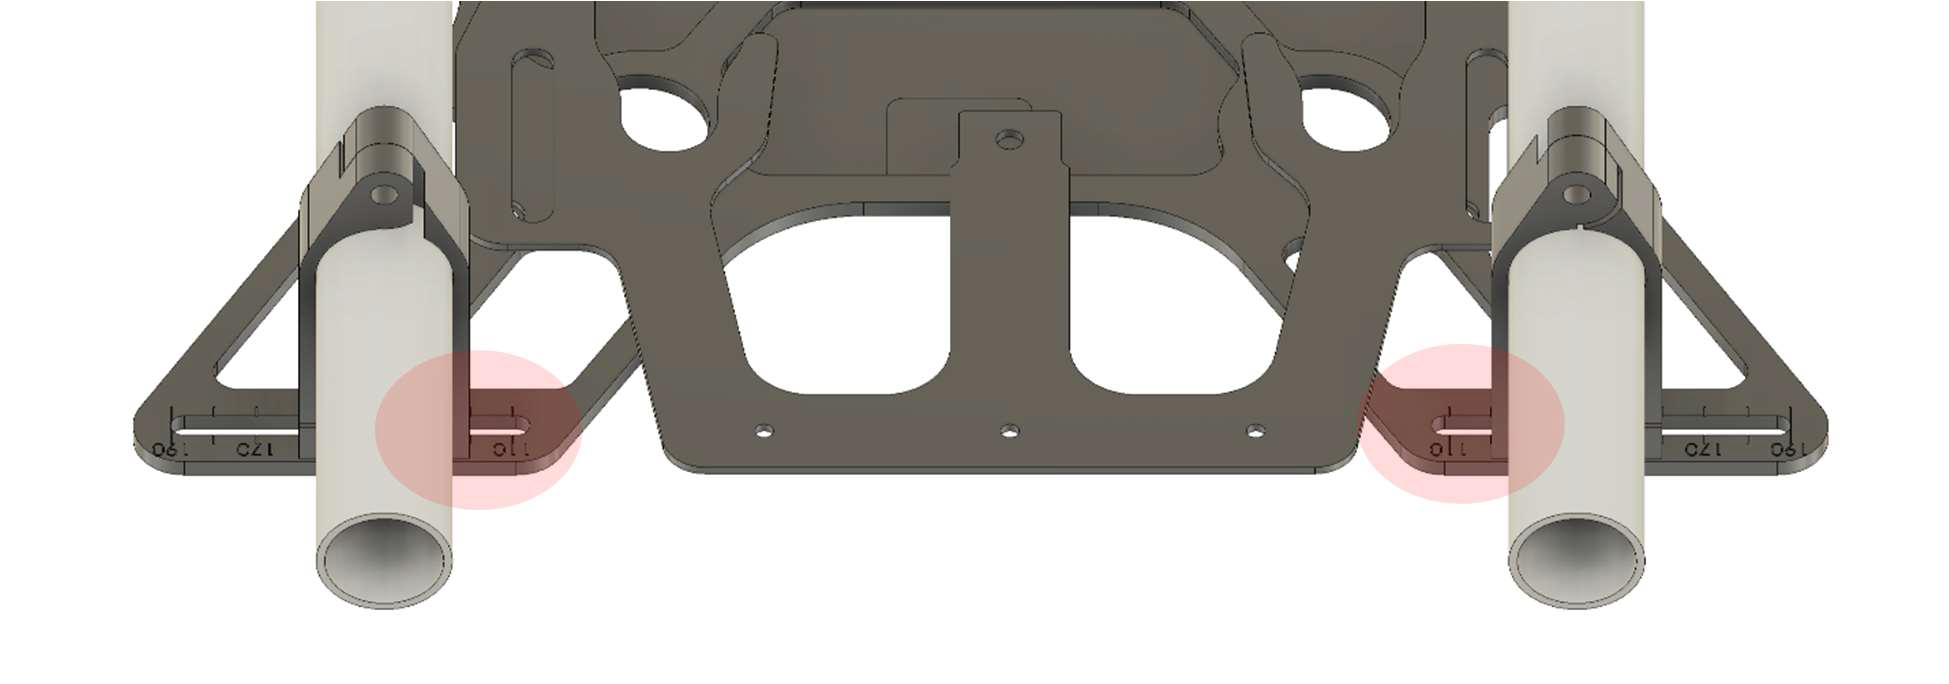
4. Center the mount using the marks on the Mounting plate.
5. Route the coaxial antenna cable from the antenna to the PLI adapter (See antenna section).
6. Connect the payload power (see Power connection section).
7. Insert the payload into the PLI adapter. Lock the sliding handle on the 4 pegs.
| Part number : FTV1001506A00T (Antenna mount included in this kit) |
Payload compatibility
All Trueview payloads equipped with a PLI-type adapter (4 pegs).
Included components
- Front Handle Payload Interface (PLI) mount
- Harris H6 Antenna mount
- Antenna (included with payload)
- Coaxial cable SMB straight jack (female) to SMA straight Jack (female), with antenna disconnect
- PLI power cable
- M3 x 10mm socket head screws (2)
- 10″ steel safety wire
Required parts
- 16mm tubemount clamps for Harris H6/Hx8 drones (4) (provided by Harris)
Required tools
- 2.5mm hex screwdriver
- 243 Medium Strength Tread Locker (Loctite)
Installing the Payload Adapter
The following steps summarize how to integrate the drone side payload interface:
1. Remove the Gremsy Dampening Plate but leave the clamps attached to the rails.
2. Add Loctite to screws and mount the PLI Plate to the Clamps using (8) M3x6 socket head screws
and (8) M3 Washers
3. Position the PLI plate using the measurements shown. Note H6 Electric and Hybrid have different
placements. H6 Hybrid is mounted near the front of the rails (18.5 from brace).
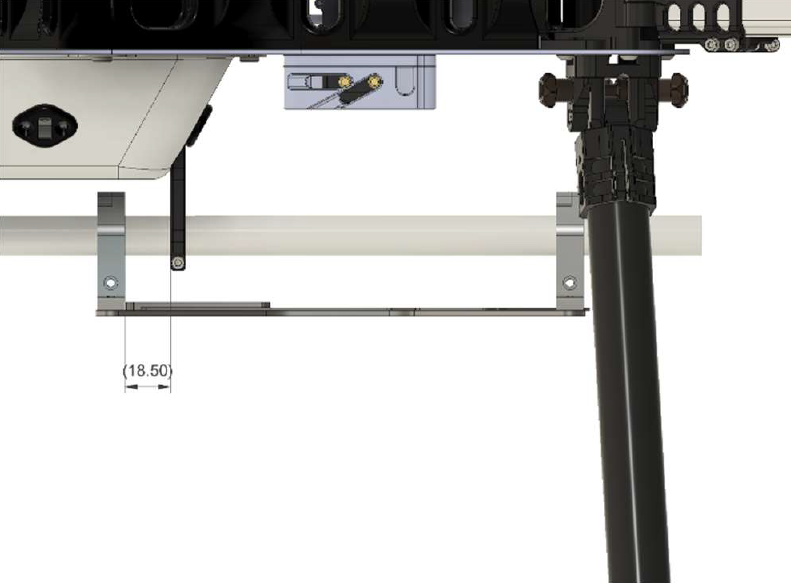
4. Center the mount using the marks on the Mounting plate.
5. Route the coaxial antenna cable from the antenna to the PLI adapter (See antenna section).
6. Connect the payload power (see Power connection section).
7. Insert the payload into the PLI adapter. Lock the sliding handle on the 4 pegs.
Payload power connection
On the Harris H6, there are two main power options, depending on the version of the Harris H6.
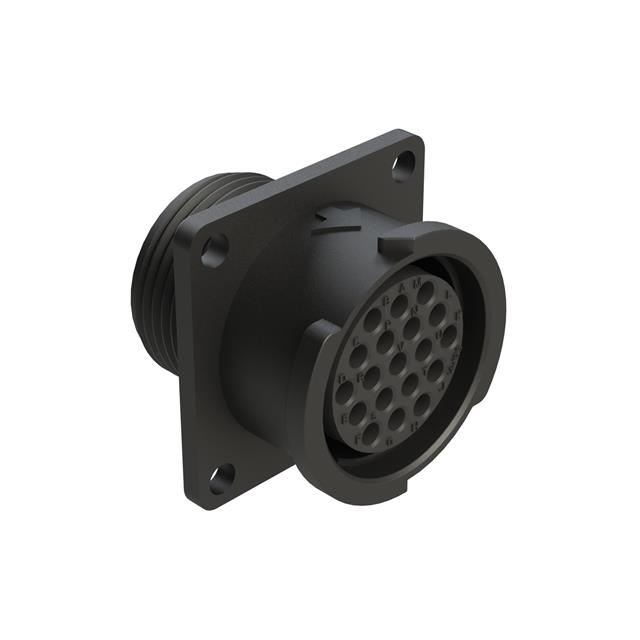
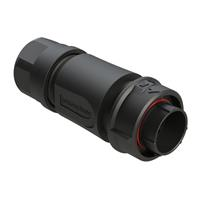
The UPC is a 19-pin connector for payload connection underneath the H6.
If your adapter comes with this plug, simply plug it into the drone-side adapter.
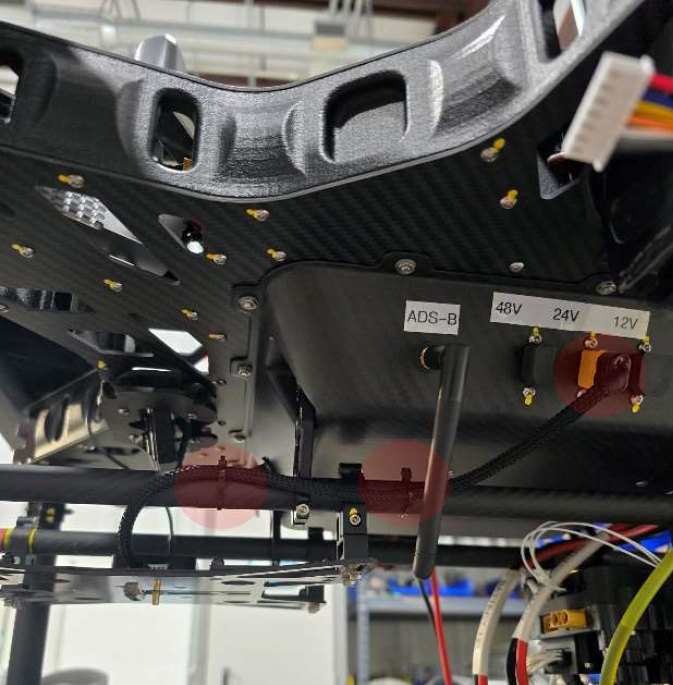
Some versions of the Harris have multiple XT60-F connectors underneath the drone.
Plug the power harness (XT60) into the 24v port on the side of the aircraft. Secure using zip ties as
shown.
Antenna Mount Installation
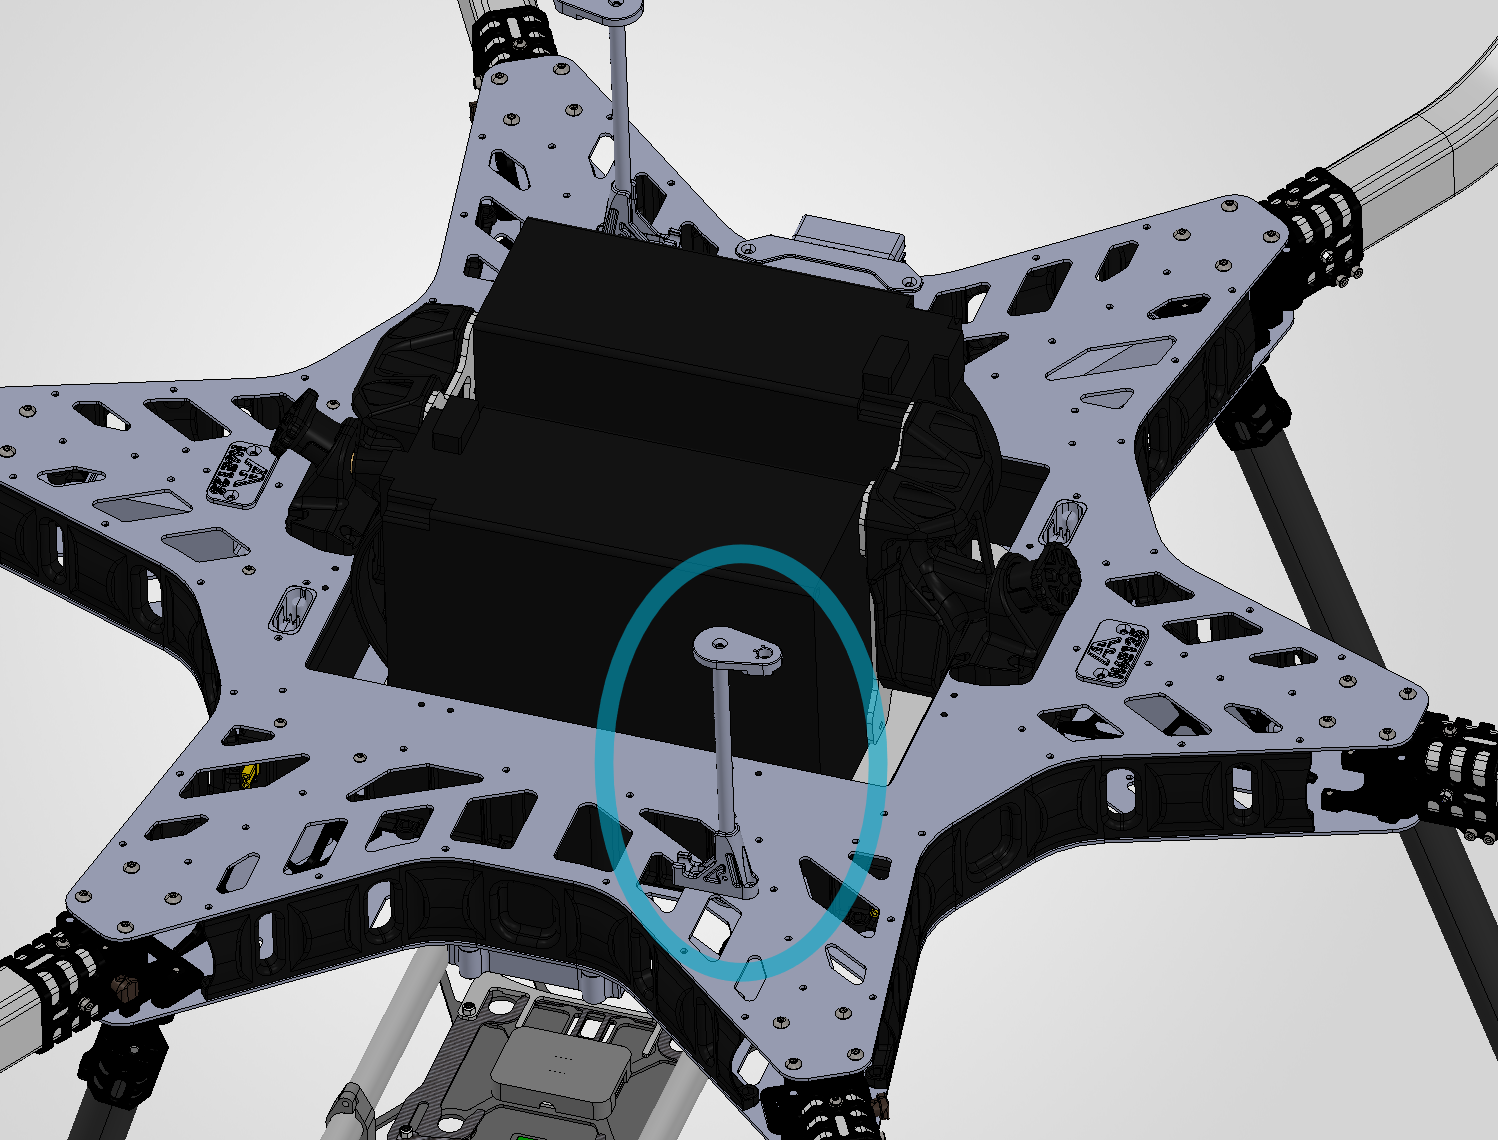
There are two options for antenna masts. If your Harris H6 comes with a folding antenna mast, that mast can be used. If it does not have the folding mast, Geocue provides a front-mounted mast.
The position of the antenna affects the payload’s lever arms. Choose the right lever arms for your payload and antenna location combination.
1. The front folding antenna mast can be used to mount the Trueview payload’s antenna
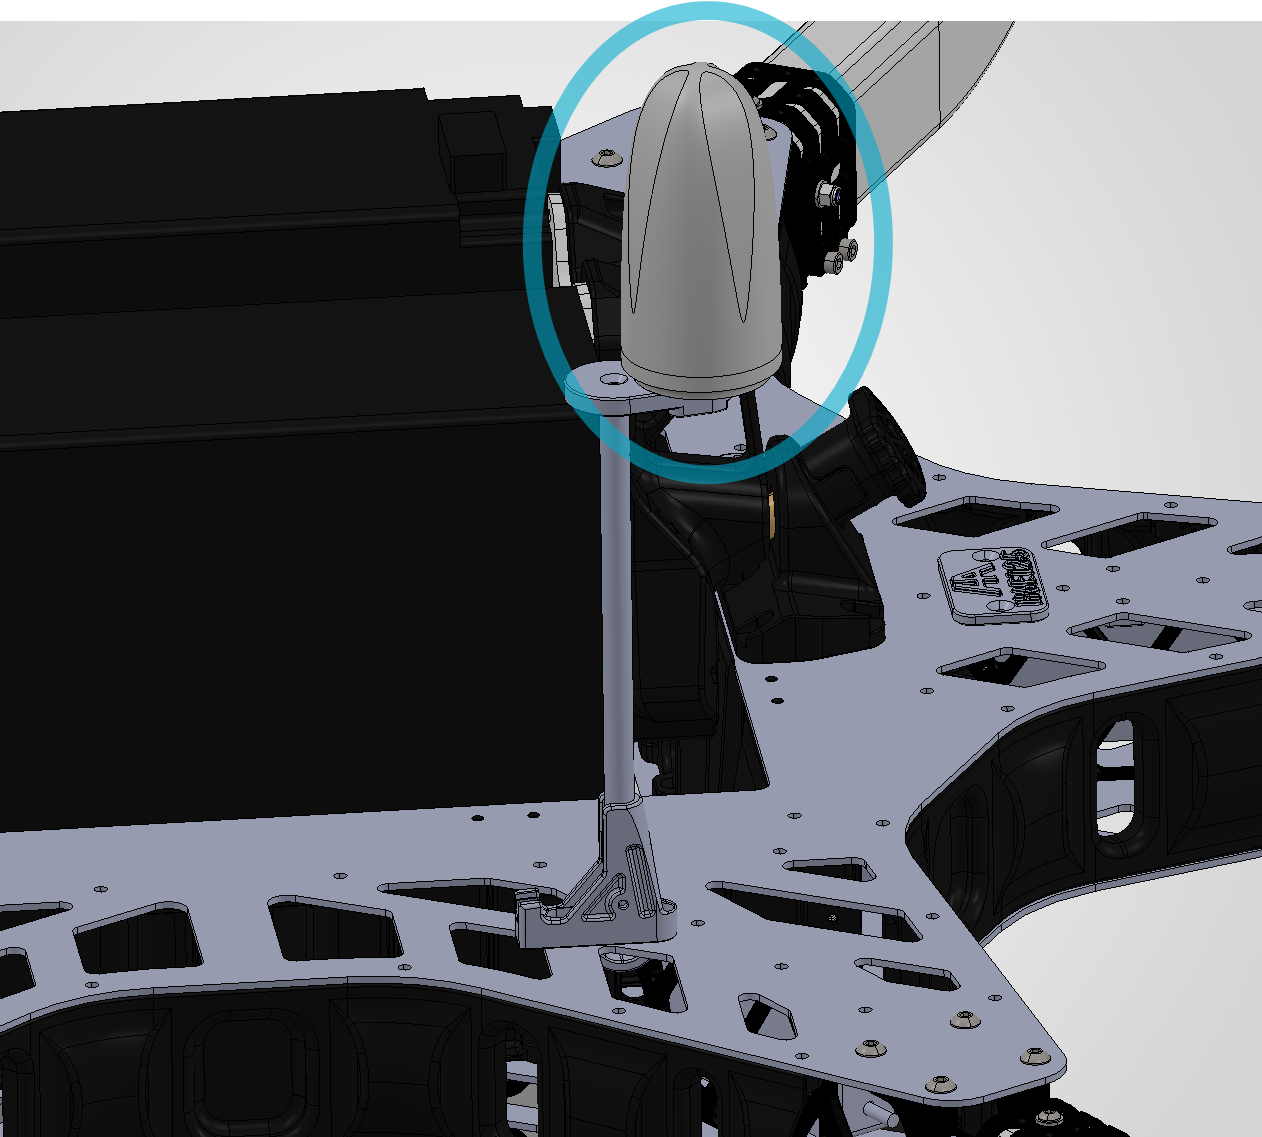
2. Install the antenna cable and screw your payload’s antenna in place.
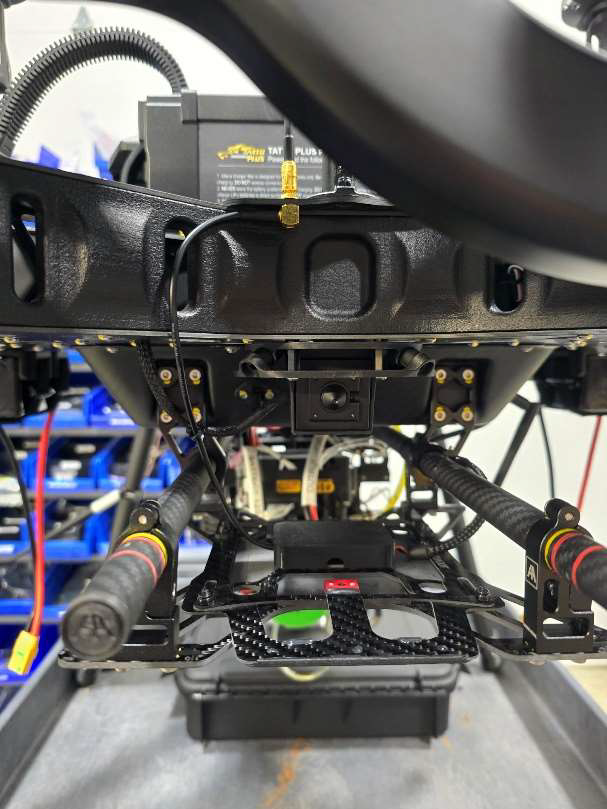
3. Route the antenna cable as shown and secure using zip ties to prevent wire from overlapping the FPV
camera.
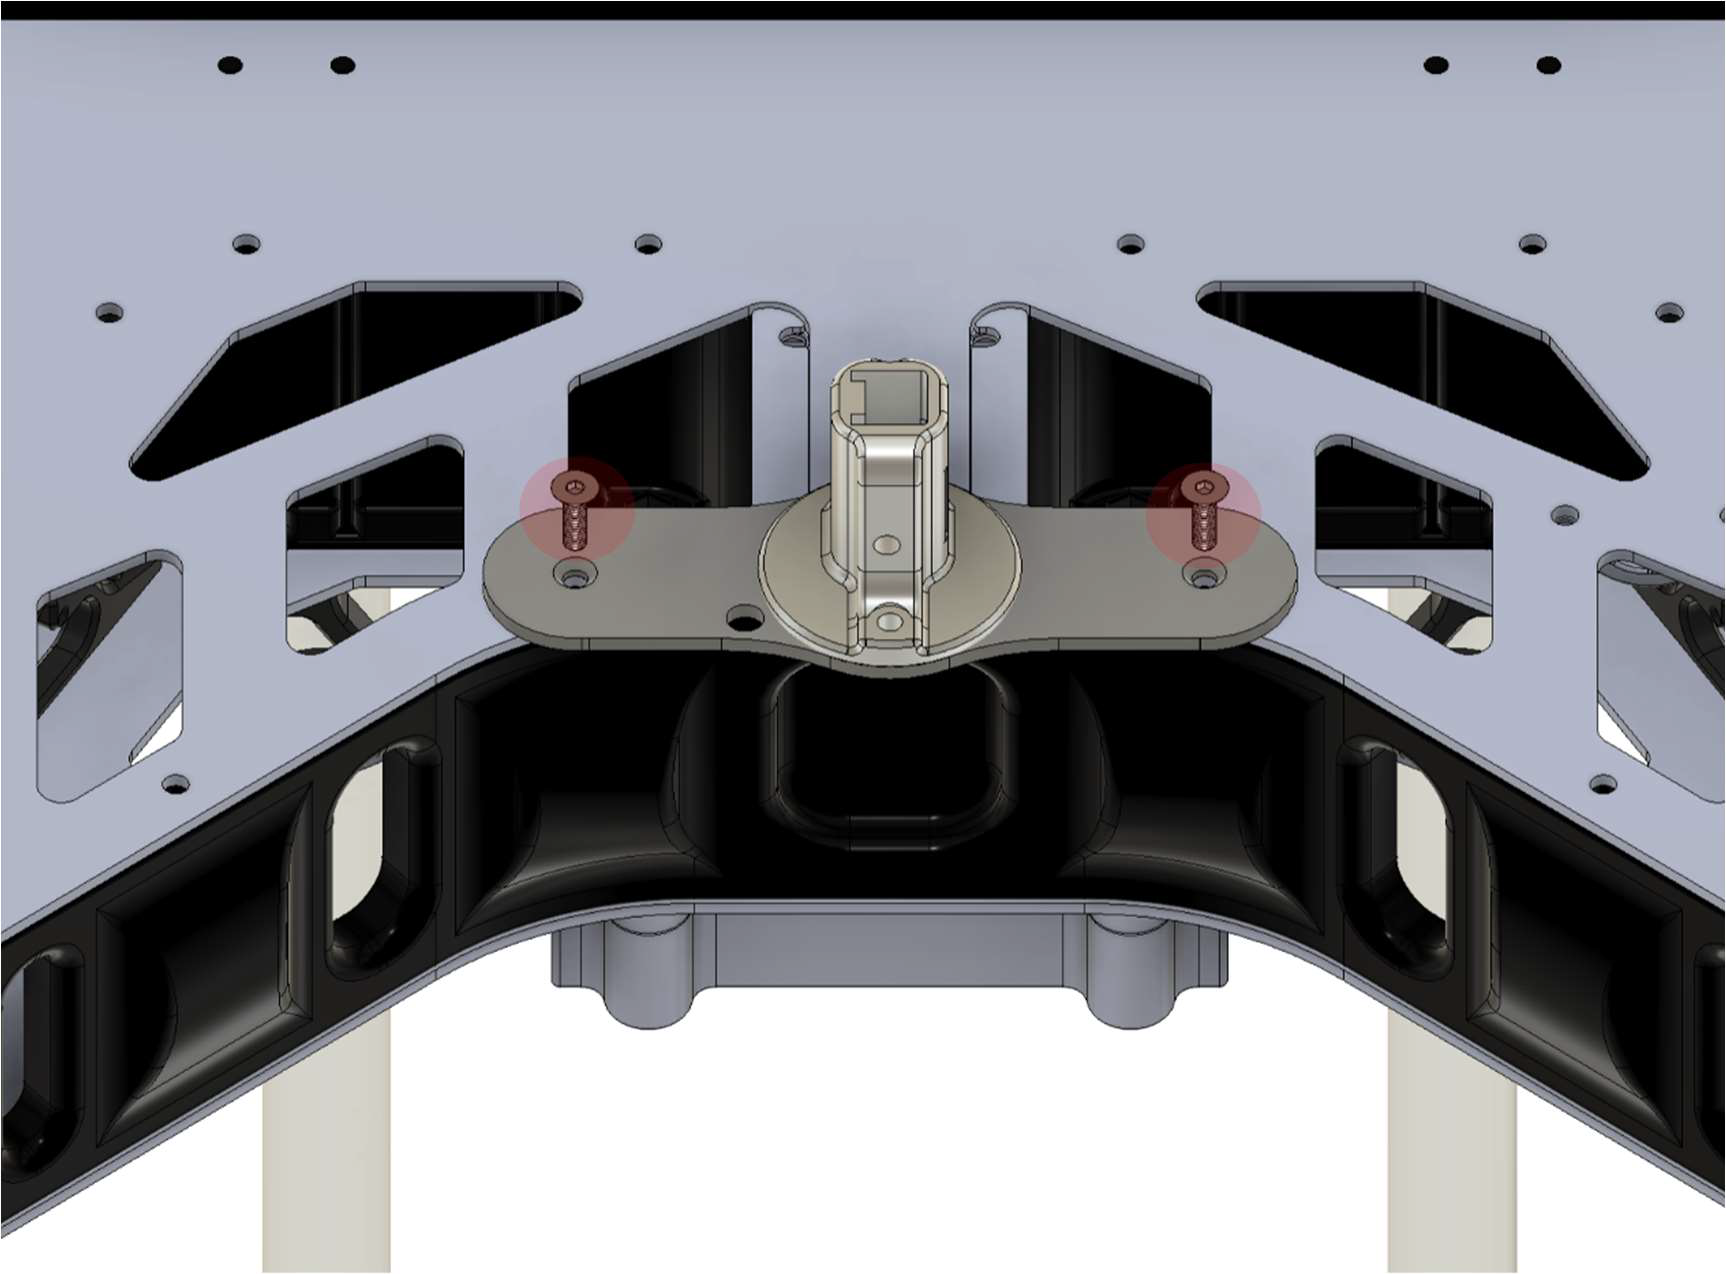
1. Remove the (2) M3 screws near the front of the aircraft.
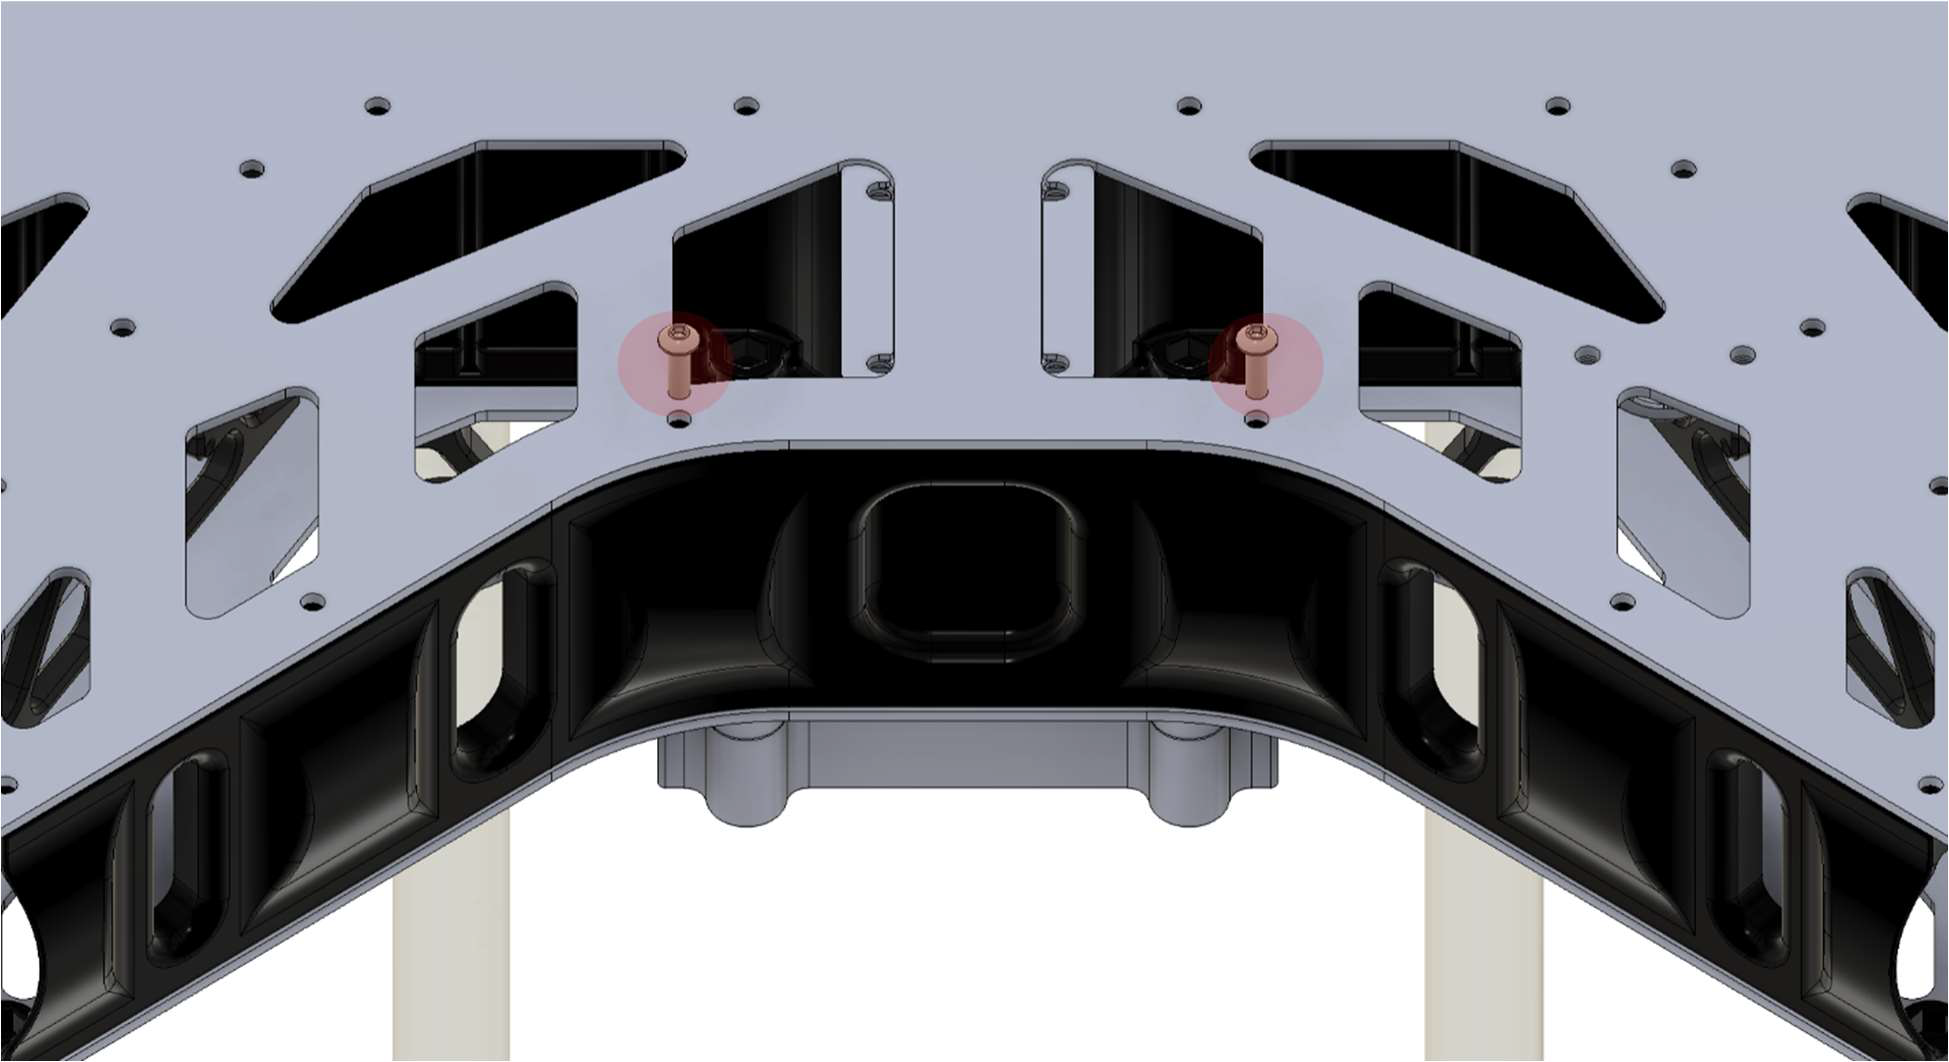
2. Secure the antenna base plate using (2) M3x10 machine head screws.
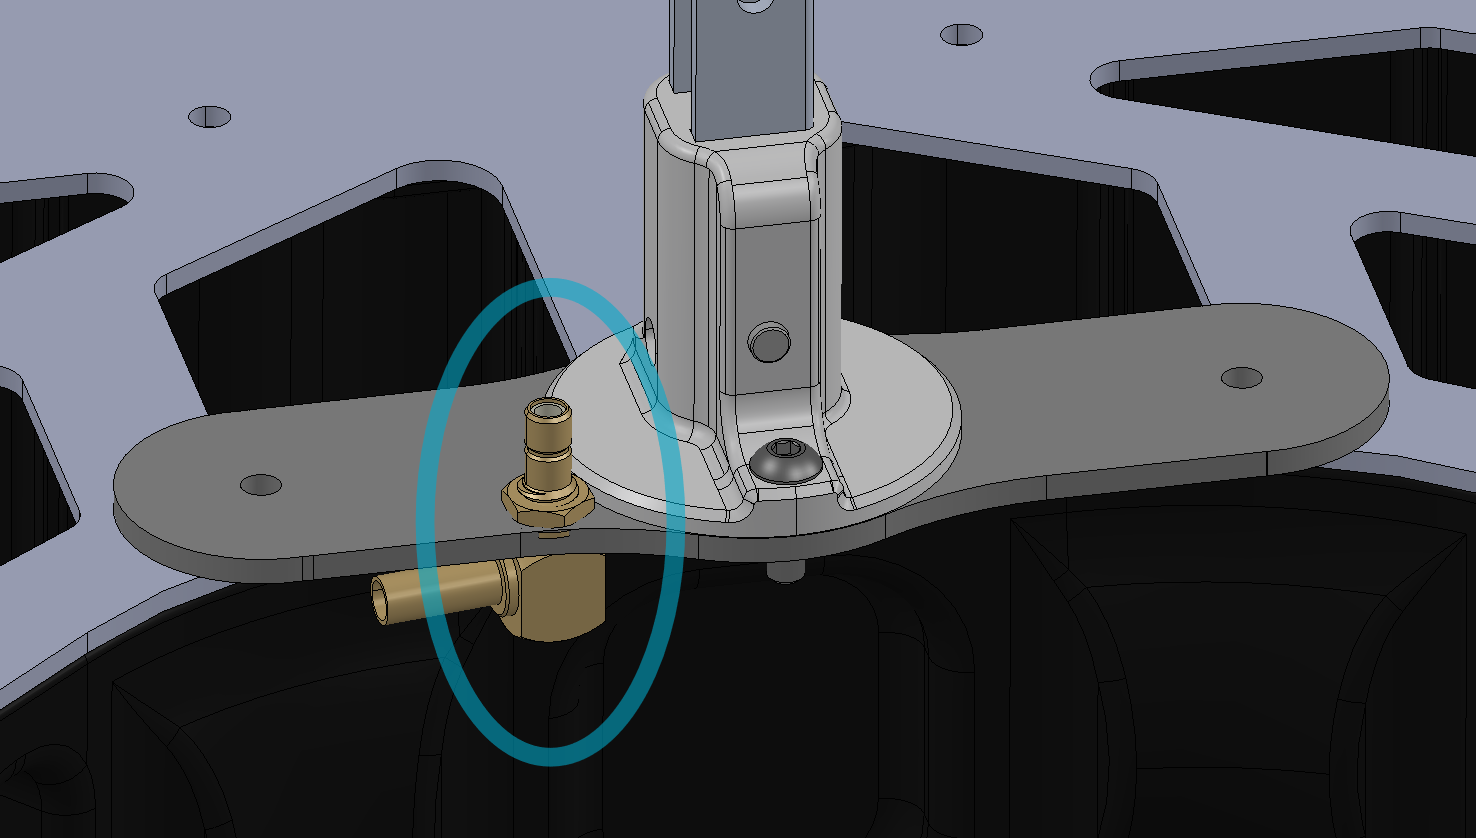
3. Screw the adapter’s SMB male antenna cable into the quick-disconnect hole on the antenna base plate.
4. Plug the antenna’s SMB female connector into the quick-disconnect SMB. This allows you to remove the antenna and mast when storing the drone.
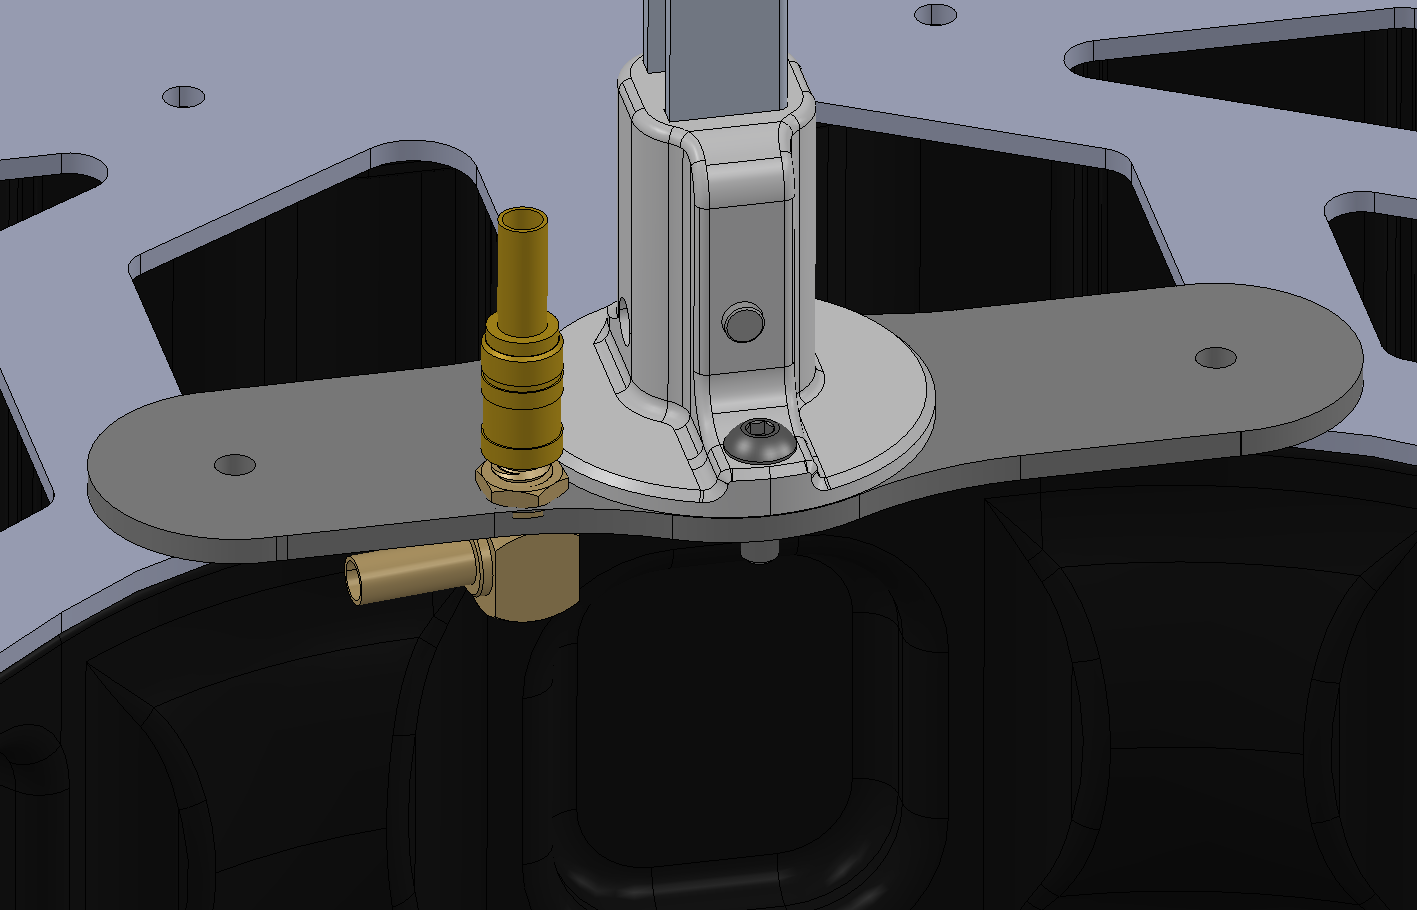
5. Route the antenna cable as shown and secure using zip ties to prevent wire from overlapping FPV
camera.
References & Printable versions
Printable versions of this guide are available as PDF documents.
Payload Profiles
For information on payload lever arms and profiles, please consult the following article :
Support
For troubleshooting how to mount your TrueView on an Harris H6, error messages, or additional workflow information, please Contact Support for assistance. Include your contact info, company name, product/version, and model/serial number for faster service.
