The following steps describe the process for updating your Loki firmware.
Note: Updating the firmware is optional. If the Loki is functioning properly, there is no need to update.
Warning: Firmware updates are not supported on machines running Windows operating systems prior to Windows 10.
- Connect Loki to your computer using the supplied USB-C cable. Note: Computer must be running Windows 10 for firmware update procedure to function properly.
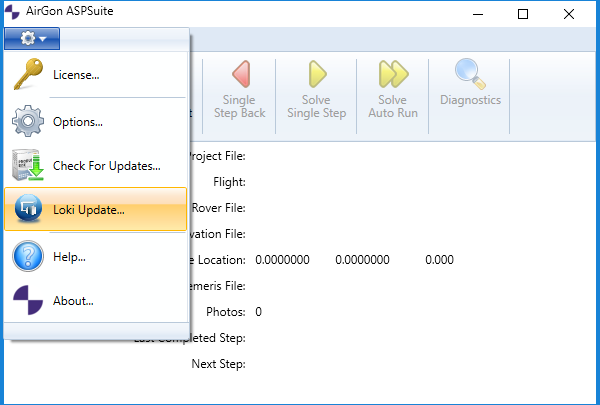
- Open ASPSuite.
- Click the gear icon.
- Select “Loki Update”.
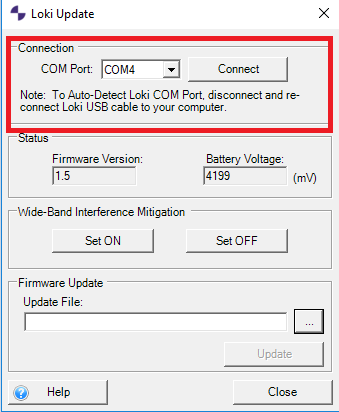
- Select the COM port from the drop down menu and click connect. (To auto-detect Loki on the COM Port, disconnect and re-connect the Loki USB cable to your computer.)
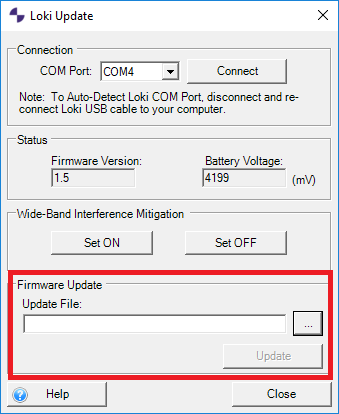
- Click the ellipsis button in the Firmware Update section and navigate to the Loki firmware file. Click “Update” once the file has been selected.
- You should receive a message saying the update was successful. Click OK.
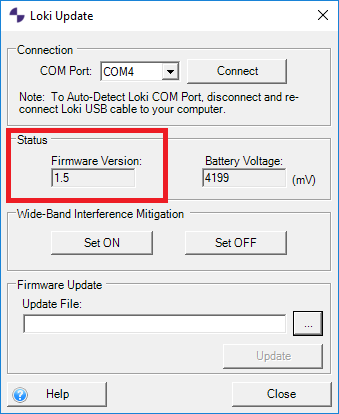
- The new firmware version should be visible in the Status section.


Hi,
This workflow is great, but where can I download the latest Loki firmware version so I can navigate to it (Section 6)?
Thanks.
The firmware on your Loki does not need to be updated if the unit is functioning properly. If you are experiencing issues, check if a firmware update is appropriate by verifying the firmware version installed on your Loki by following steps 1-5 above. The current Loki firmware version is v1.8.2. If your version is older, provide the installed Loki firmware version, the Loki serial number, and the observed issues to our support team, by e-mail or via the support form on our website for verification.