Introduction
For additional visual reference when working with the GeoCue Map View, you can add layers in the Map View that are ‘mapping’ to a Web Mapping Service. It is often the case that you will continually reuse a small set of WMS layers within your GeoCue projects. To make this easy to set-up, we have implemented a WMS Catalog Service directly in GeoCue. Thus, prior to adding a WMS layer to a project for the first time, you must first create your WMS catalog. Your WMS catalog will be shared across all your GeoCue projects, so you only need to do this set-up once.
Creating a WMS Catalog
The WMS catalog is set up using the WMS Manager tool in GeoCue Client. This tool is accessed from the main GeoCue Map View toolbar:
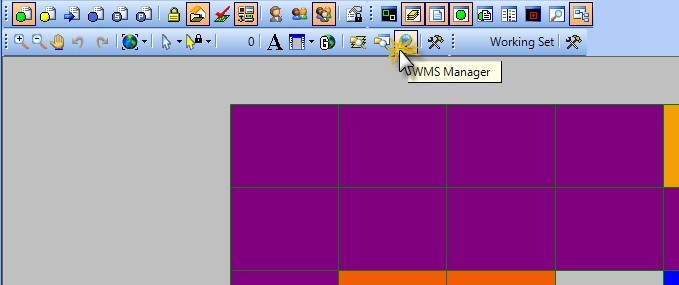
WMS Manager Tool
The WMS Manager is depicted below. The first step in adding to the WMS Catalog is to add a WMS Server or select from the GeoCue pre-defined servers (Open Street Map and Bing). This is done in the upper part of the dialog box.
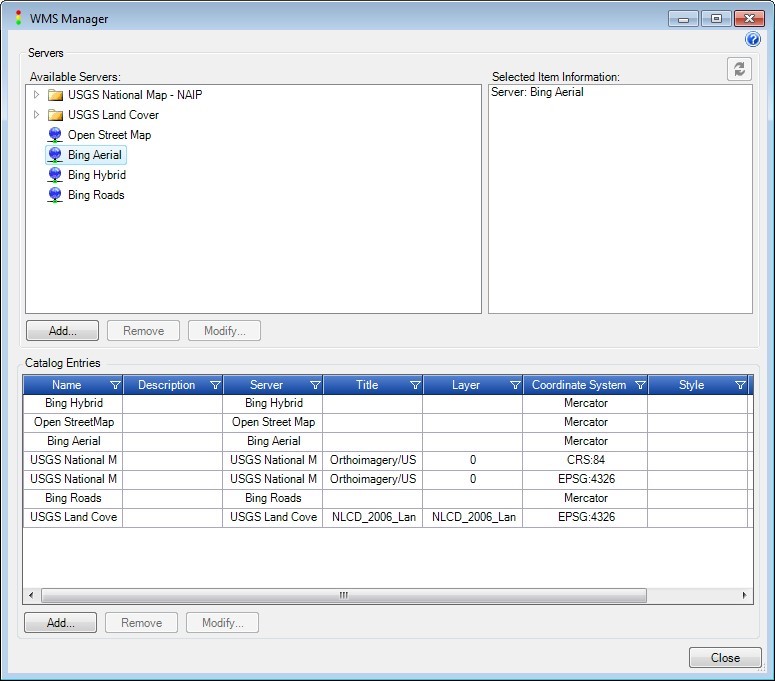
WMS Catalog
To add your own WMS Server, press the Add button that is located directly below the Available Servers pane in the upper part of the dialog box. This will invoke the dialog below.
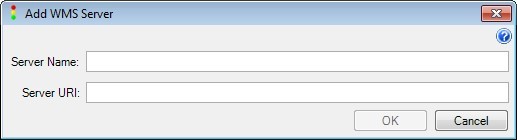
Add WMS Server
Enter the name you would like associated with this server in the Server Name field. This is a simple text field that you will use as your ‘familiar’ name for the server. Enter the actual Universal Resource Locator (URL) string in the Server URL field.
GeoCue will validate your server and display the hierarchy. Select the ‘branch that you wish to use as a layer in GeoCue (by expanding entries and selecting the appropriate terminal branch in the Servers pane) and then press the Add button below the Catalogs section of the dialog. Note – If you have not selected a valid catalog level in the Servers pane (a valid level, usually at the EPSG code entry, will appear in green), the message “No Valid Catalog Entry selected in Available Servers” will be displayed and the Add button will not enable. When you press the Add button under Catalog Entries, you will be presented the following dialog.
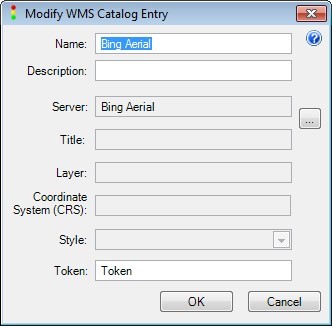
Modify WMS Catalog Entry
The Name is any familiar text string you would like to use. It must be unique across all of your WMS catalog entries. This is the name that will be displayed to users when they add a new WMS layer to a project so it should be chosen to make the layer content obvious.
The description can be any textual notation. It is not displayed during layer selection by users. The Style field allows you to choose the desired style being presented by the WMS Server entry. This field is populated by a Style request sent to your selected WMS Server. Pick the desired style from the dropdown list. Finally, “Token” is used by restricted or licensed WMS Servers (such as Google and Bing). You must obtain a token from your chosen WMS provider using whatever scheme that provider has instituted. Some providers allow temporary or experimental use without a registered token. You can attempt to use these experimental services by typing in a string such as “token” for this field. Note that Open Street Map does not require a token. Click OK on the Add Catalog dialog and your new WMS entry will be ready for use! The next step is to add the layer to your GeoCue project.
Creating a WMS Layer
A Web Mapping Service (WMS) layer is added to a project via the Add Layer tool in the Table of Contents (TOC). To add a WMS layer, select the layer just above where you would like the new WMS layer inserted in the TOC. Next either press the Create New Layer tool (on the TOC main toolbar – Figure 2-29) or right-click and select “Create New Layer” from the right click TOC menu. The Create New Layer command will display the dialog.
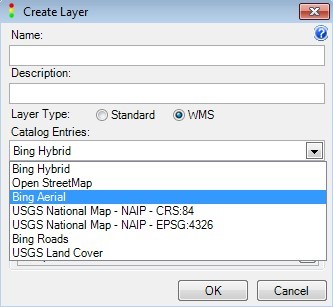
Create WMS Layer
Choose WMS from the layer type radio button section. This will enable a drop-down list of all of your WMS catalog entries. Provide a name for the layer and an (optional) description. Note that the coordinate system is displayed for informational purposes only; it cannot be changed (if your WMS Server provides different coordinate systems, make a separate entry for those you desire to use in the WMS Manager).
That’s all there is to adding the WMS layer!
NOTE: A WMS layer in GeoCue is a fully qualified layer, you can add multiple WMS layers, sort the layers, set opacity, hide them and so forth. Since GeoCue Client supports “on-the-fly” coordinate reprojection, you can add WMS layers with mixed coordinate reference systems and have them simultaneously displayed.
NOTE: Many WMS Servers provide data in less than optimal speed. GeoCue has implemented WMS drawing as an asynchronous activity. This means that you can continue working in a project while a WMS layer repaints in the background.
