If you already have LAS files and an index for those LAS files you can skip some of the processing steps typically performed when starting from LAS Source Strips.
Start by creating your Working Segment entities using a pre-existing compatible shapefile or CAD file.
Next, attach the LAS files to the Working Segment entities following the Attaching Files using Entity Manager workflow.
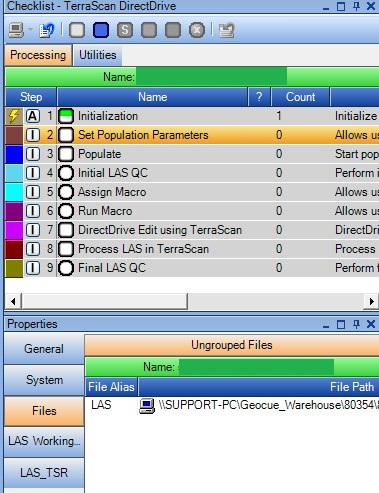
After attaching files using Entity Manager, the files are copied to the warehouse, but the Set Population Parameters and the Populate steps are not Complete, although the file does appear in the files collection of the LAS Working Segment properties pane in GeoCue.
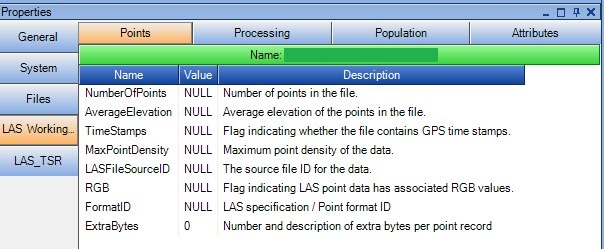
The LAS Working Segment Properties will also have NULL values.
As a result, if you try to run any process on, or using, the Working Segment you will encounter an exception or warning. For example, trying to populate to another working segment with those entities with attached LAS files as the Source Layer shows a warning in the Checklist Step Details “Not populated because the LAS file would be empty”. It doesn’t see any points from which to populate the destination Working Segment(s).
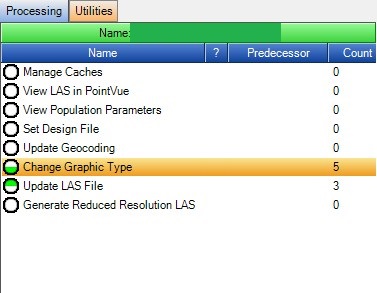
In order to fix (or prevent) that, you need to run the Change Graphic Type step located on the Utilites tab of the Checklist Pane after attaching the LAS files and prior to running a process on, or using, those Working Segments.
The Change Graphic Type dialog box will appear, with a few options. Original Graphic preserves the graphic as you attached it. Convex Hull computes the rough elastic band extents of the data (if desired). The important part is to ensure the (Re)Compute LAS Working Segment Attributes is checked.

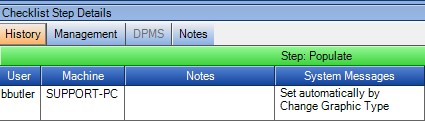
When complete, check the Processing tab of the Checklist, and select the Populate step, which should now show as Complete. Look in the Checklist Step Details pane, and the System message should read “Set automatically by Change Graphic Type”.
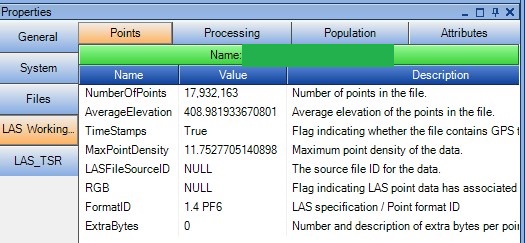
And the LAS Working Segment Properties are now correctly populated.
These LAS Working Segment entities will now be ready to use in the same manner as ones populated from imported LIDAR Sources.
