1. Introduction
LP360 Cloud Ground Classification is a module available in LP360 Cloud, starting in 2024, and can be used to automatically classify the ground for data on the cloud. In this article we’ll explain step by step how to use the LP360 Cloud Ground Classification module. Refer to the LP360 Cloud Ground Classification – Method and Context for more detailed explanations behind the settings. We’ve also included a tutorial video for reference below.
A user must be assigned an LP360 Cloud Starter license from the LP360 Portal to use Ground Classification in LP360 Cloud.
2. How to access the module
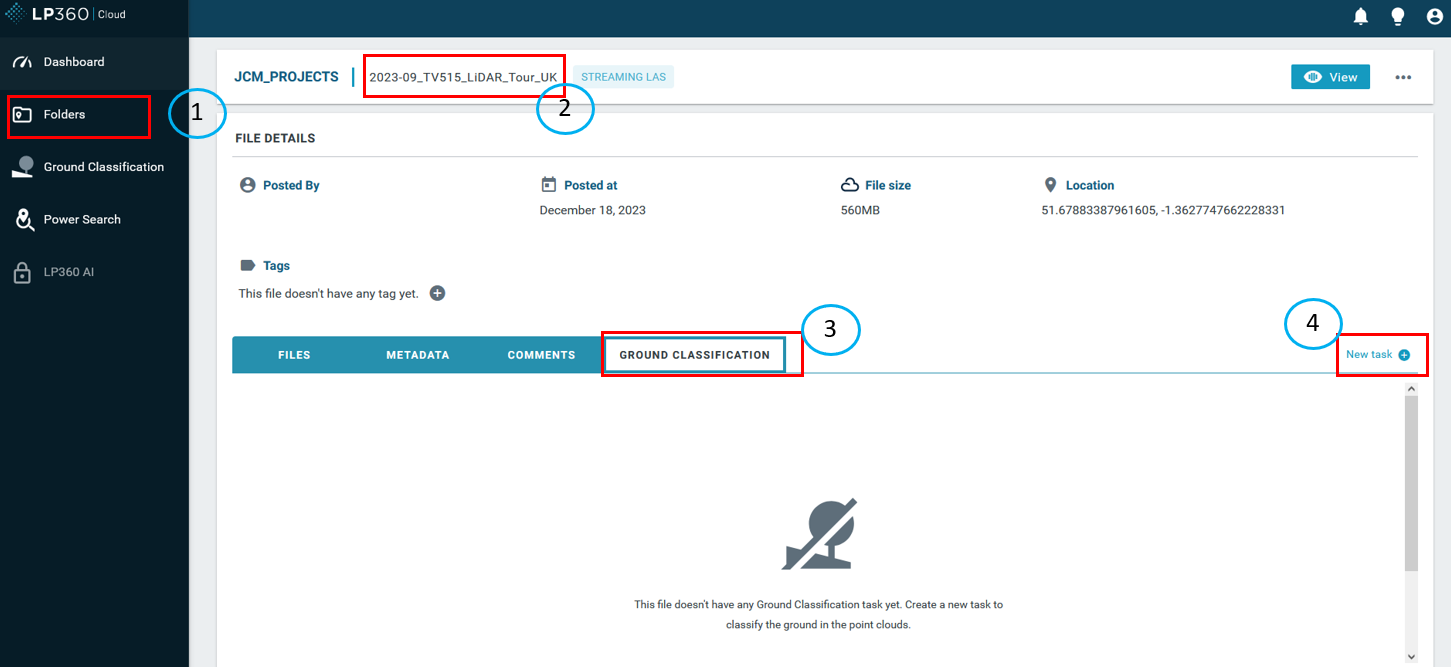
- Open LP360 Cloud.
- Select Folders
- Select the folder containing the desired data.
- Select LAS file(s).
- On the Ground Classification tab, select “New task”.
3. How to use LP360 Cloud Ground Classification
Before using the LP360 Cloud Ground Classification, make sure to have a clean point cloud. This means remove outliers (low and high noise) and perform smoothing.
3.1. Pre-requisite steps
LP360 Cloud Ground Classification can only be used with LAS 1.4 PDRF 6,7 or 8 files uploaded in LP360 Cloud. The module can only be used after performing the following steps:
- Input the point cloud into LP360 desktop.
- Upload a point cloud to LP360 Cloud using the LP360 Cloud Uploader.
- The point cloud must be available in LP360 Cloud.

3.2. How to use Ground Classification module
After uploading a point cloud, we can perform the following Ground Classification steps:
- Select a point cloud.
- Open the LP360 Cloud Ground Classification module.
- Select “New task”.
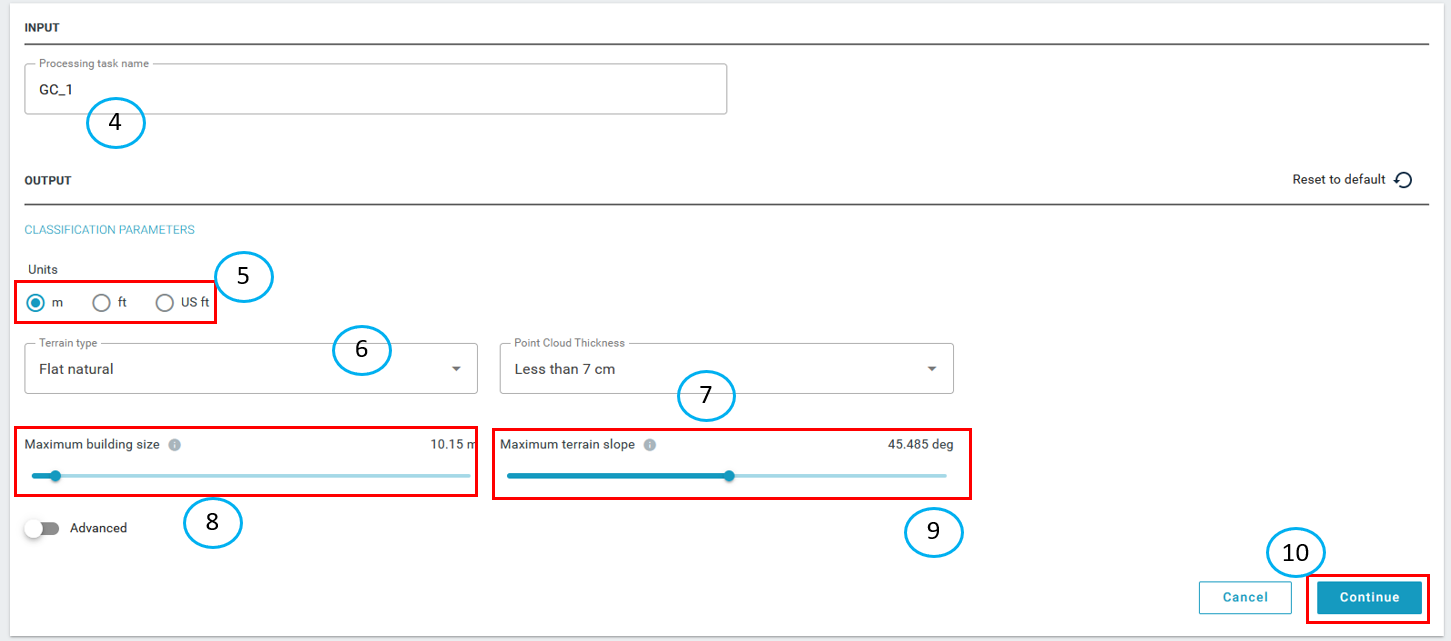
- Provide a processing task name.
- Select the units.
- Select the terrain type. The most common is “Flat Natural”.
- Select the Point Cloud Thickness. TrueView 3DIS recommendation: Less than 7cm.
- Select Maximum building size. Tip: if there are no buildings, select 5m/15ft.
- Select Maximum terrain slope. Tip: if you don’t know, select 45 degrees.
- Check “Merge LAS Layers” and then select “Continue”.
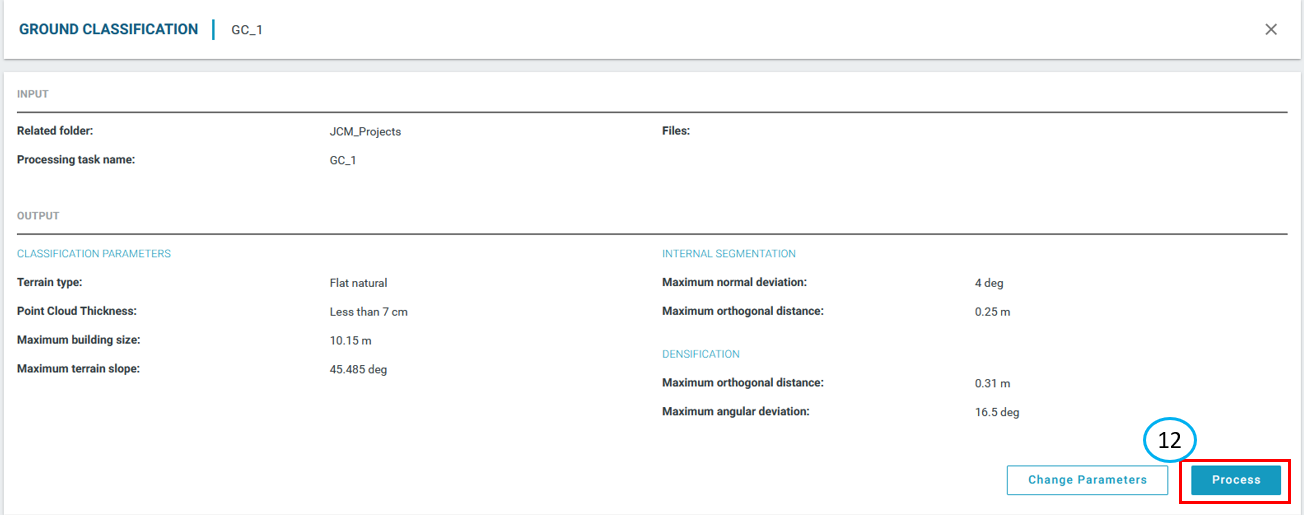
- Review the selected parameters.
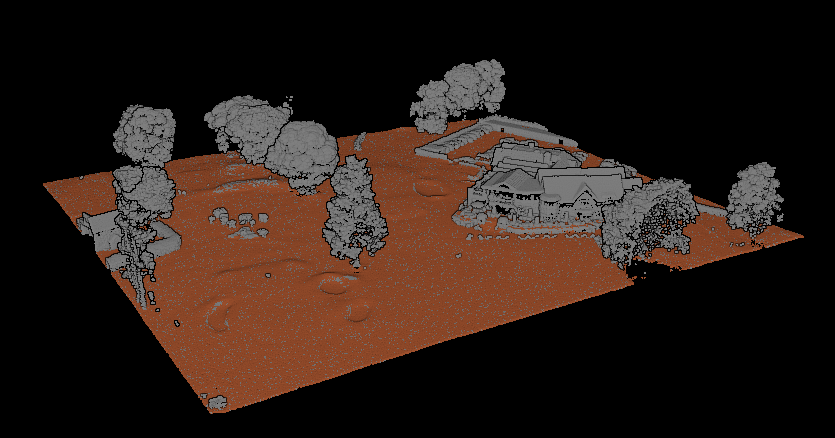
- Select “Process”.
- When the task finishes, you will be notified by:
- Notification panel inside LP360 Cloud
4. Recommended settings
The following sections provides recommendations to get the best results from LP360 Cloud Ground Classification using TrueView 3DIS sensors.
- Select the terrain type, the three most used are:
- Flat Natural: Default, either with no buildings or few of them. It can also be used for forest.
- Flat Urban: In case you have a dataset of a town or a compound. There are many buildings inside the point cloud.
- Mountainous: In case you have a dataset with big slopes.
- Point cloud thickness:
- Less than 7cm: Default.
- More than 7cm: Select if you have not performed Smoothing for the following sensors:
- DJI L1 or L2
- mdLiDAR1000HR
- mdLiDAR1000LR
- Maximum building size: Approximate the maximum size of a buildings, usually this value changes from 10 to 20 meters / 30 to 60 feet. If there are no buildings, select 5 meters or 15 feet.
- Maximum terrain slope: 30 to 50 degrees should cover most cases. The value does not need to be very accurate. The value selected is always +-15 degrees.
- Merge LAS Layers: Enabled by default. Note: it can create very large LAS files if multiple Cycles are merged.
