TrueView 3DIS (3D Imaging Systems) produce images and positional information which can be imported into TerraPhoto for orthomosaic generation, point cloud colorization, powerline workflow – image view, etc. Here we’ll review the process for importing this data into TerraPhoto, which includes: exporting a photo package from TrueView Evo/LP360 Drone, rename the images for import into TerraPhoto, setting up a mission, importing camera calibration(s), and creating an image list.
Export Photo Package of TrueView Images to be Processed in TerraPhoto
To begin, export a Photo Package from TrueView Evo/LP360 Drone for all desired Cycles for the project. More information on Photo Packages and how to export one can be found in the TrueView Evo Users Guide.
Rename TrueView Images to TerraPhoto Compatible Names
Once the photo package is generated, convert the image file names to a TerraPhoto compatible naming scheme using the TV_to_TPhoto Renamer utility. After downloading the utility you will need to extract/unzip executable to be able to use it.
Open a command prompt and follow the steps below to rename the files from YYMMDD_HHMMSS_P/S_XXXX.JPG to YYMMDD_HHMMSS_1/2_XXXX.JPG in the respective port and starboard camera folders of the photo package. The utility will also rename the corresponding photo names in the merged_image_geo_opk.csv file.
- Open a command prompt.
- Drag and drop the provided executable into the command window.
- Drag and drop the port or starboard camera folder from the photo package into the same window.
- If converting the naming for the port camera, type out “_P_ _1_”, note the space between the second and third underscore, or, for the starboard camera, “_S_ _2_”, again, note the space between the second and third underscore.
- Drag and drop the merged_image_geo_opk.csv file into the command window.
- Press enter to execute the rename
- Repeat for the process for the other camera folder and run using the same merged_image_geo_opk.csv file.
Example command line string:
C:\Users\mstevens\Documents\TV_to_TPhoto_Renamer.exe D:\Tickets\15479\Photo_Package_2\C89RA1110G00064 _P_ _1_ D:\Tickets\15479\Photo_Package_2\merged_image_geo_opk.csv

Setting up a mission in TerraPhoto
Once the images have been renamed to a compatible format for TerraPhoto, the user will need to setup a TerraPhoto mission.
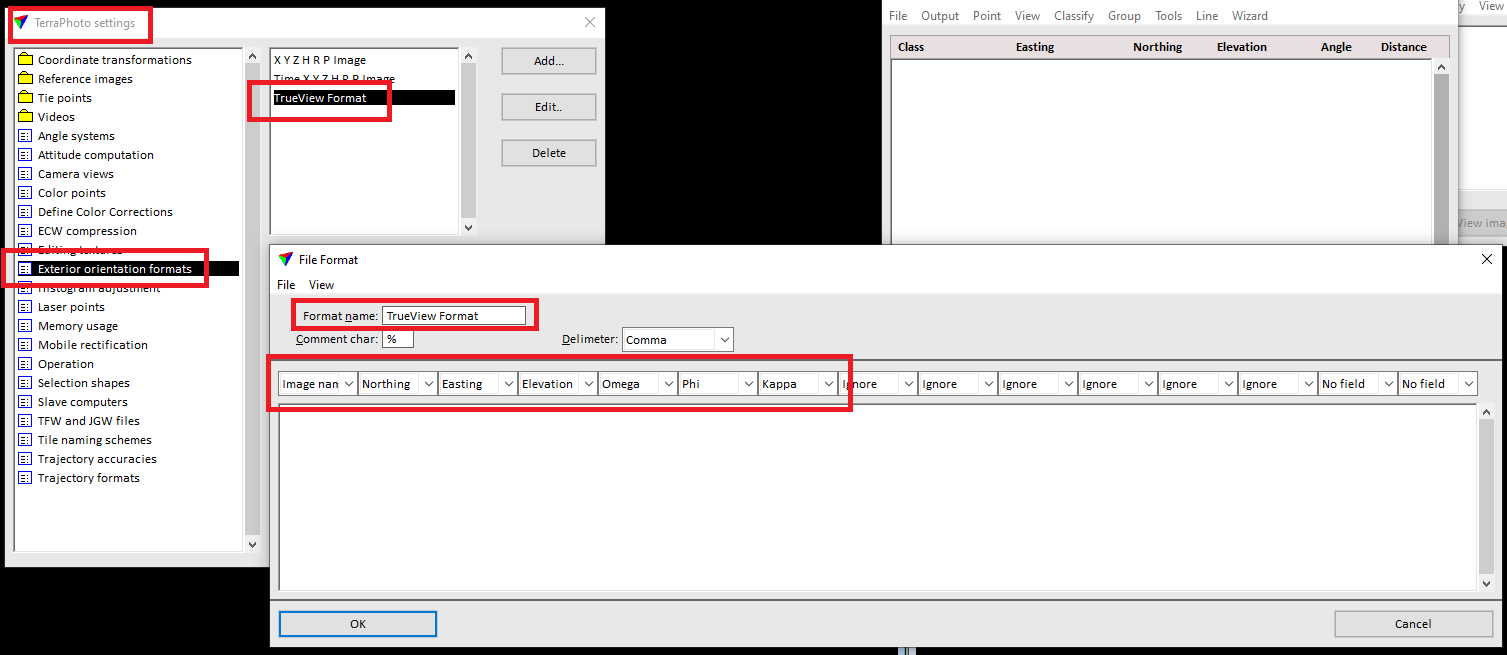
- Open TerraPhoto and go to TerraPhoto Settings. Go to Exterior Orientation Formats. Select the Add button. Select on View in the newly opened dialog and switch the number of fields to 15 fields. Name the format, “TrueView photo import”. File -> Load an example: browse for the merged_image_geo_opk.csv file from the photo package. Set the columns as “Image name, Northing, Easting, Elevation, Omega, Phi, Kappa”. Click OK to add and save this format. Your formatting should look something like this:
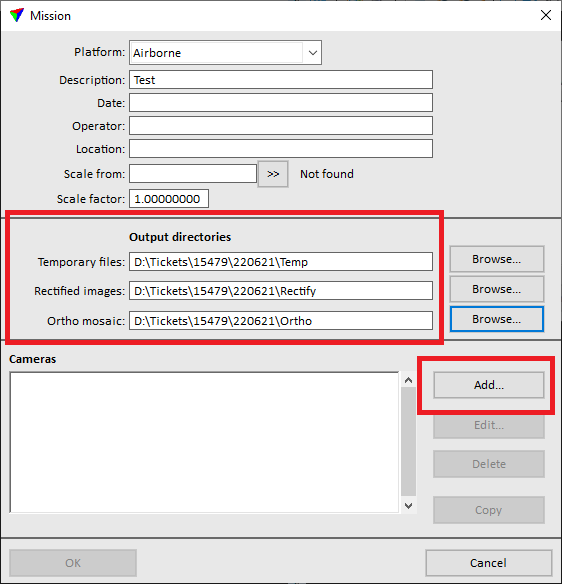
- Open the main TerraPhoto window and go to Mission -> New Mission…
- Give the mission the desired descriptors.
- Set desired Output directories, typically .\Temp, .\Temp, \Ortho.
- Set the Scale from to scale from your desired project coordinate reference system (CRS) by entering the EPSG code for the horizontal projection or by selecting >> and filtering until you find the correct CRS.
- Select on the Add… button in the Camera section at the bottom to add the first camera.
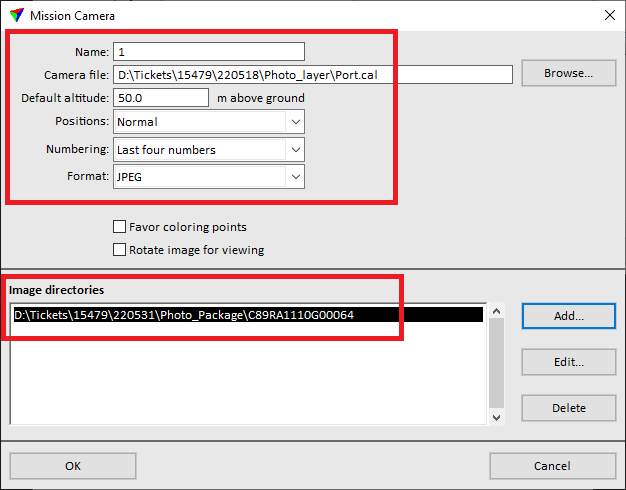
- Give a name for the camera. It’s recommended to name the port camera, “1”, and the starboard camera, “2”. Input the camera calibration file for the camera specified. Note: Camera calibration files are provided by GeoCue Support upon request.
- Specify the rough altitude of the flight should you wish to preview the rectification without a surface. Numbering format is last 4 numbers. Image format is JPEG. Add the image directory for the camera, then select OK. Repeat the process for the other cameras.
- Once you have added both cameras, select OK. Your mission settings should look something like this:
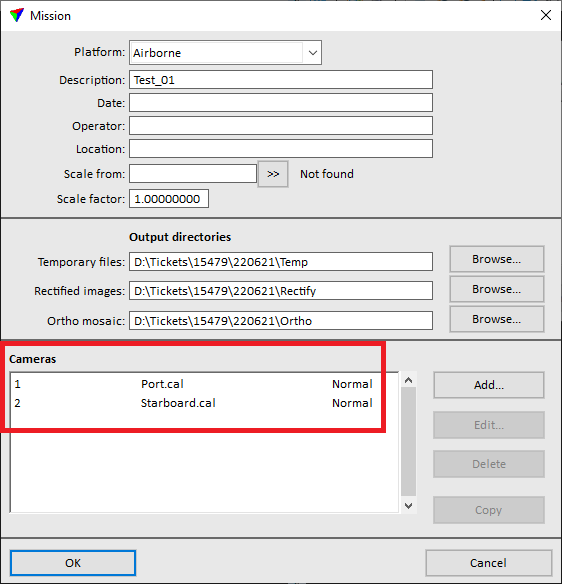
- In the main TPhoto window, go to Mission>Save Mission As… and save the mission.
Create an Image List
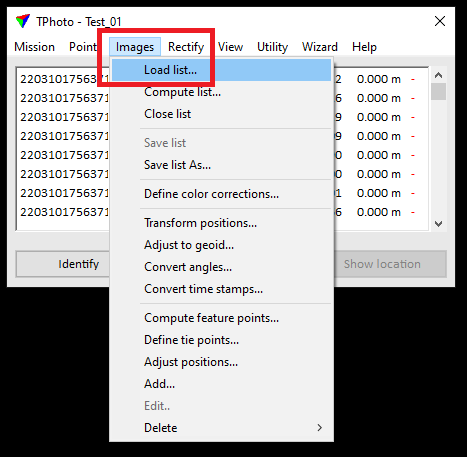
Once the mission has been created, the last step is to load the image list. The list will be loaded from the EO file, merged_image_geo_opk.csv. In a previous step, the formatting for TerraPhoto to recognize this file was setup.
- Select Images -> Load list… Choose the merged_image_geo_opk.csv file from the photo package.
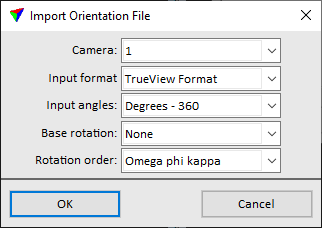
- Another dialog will appear. Choose camera 1 (port), the EO Input Format you configured in Photo Settings, Input Angles as Degrees – 360, Base Rotation: None, Rotation order: Omega phi kapa, and select OK.
- From the loaded image list, manually select all of the camera 2 photos. This can be done by left-clicking on the first camera 2 image, scrolling to the bottom and shift+left-clicking. Note: Currently, multiple camera calibrations are not imported at initial image list import.
- Once the camera 2 images have been selected, click on Images>Edit. Select camera 2 and click OK.
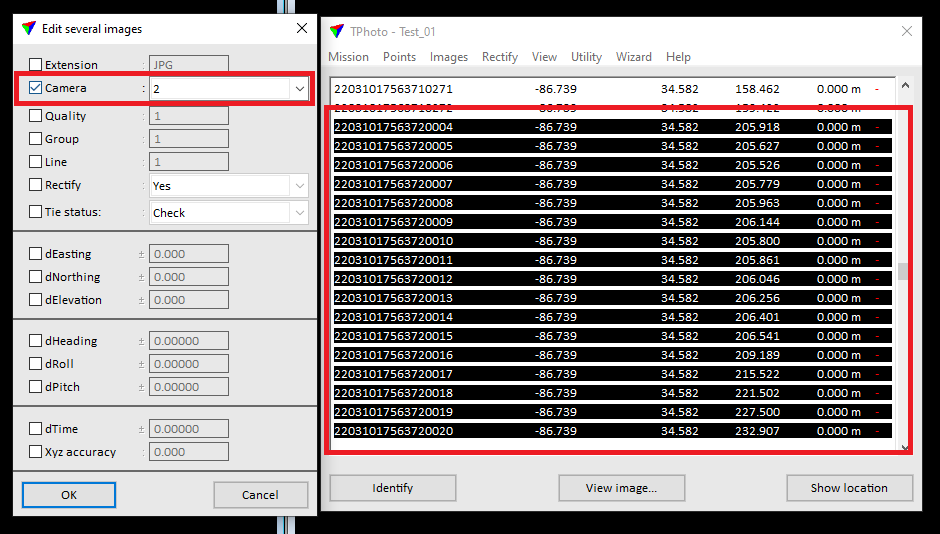
- Once you have selected camera 2 for the camera 2 images, you should now see OK to the right of camera 2 images as well, if you have the File Status field displayed in the main TerraPhoto window. Go to Images -> Save List As… to save the image list.
Now the TrueView images should be ready for processing in TerraPhoto.
Additional Options
Transform Image Positions
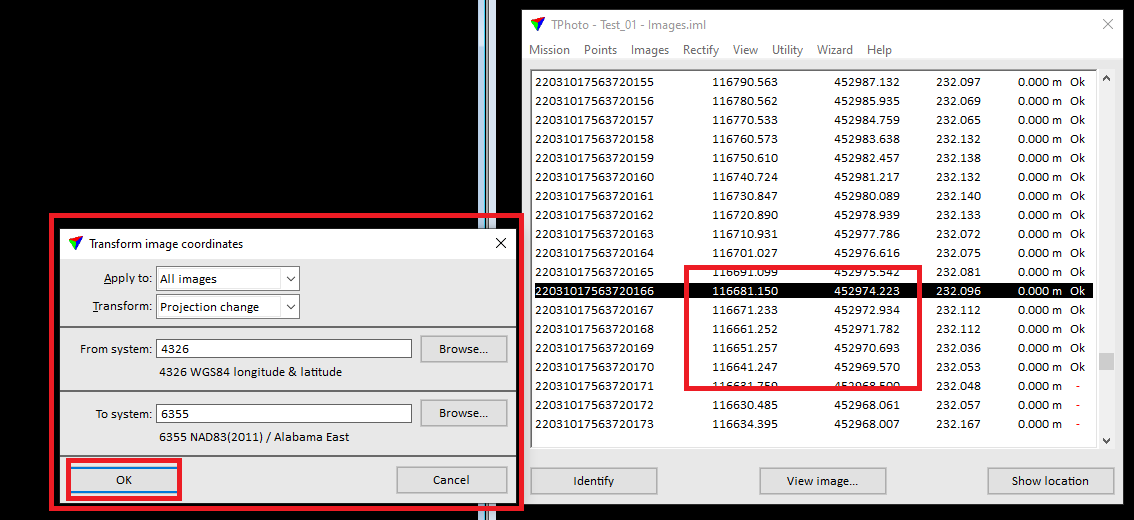
Users will most likely want to transform the photo positions to match the Coordinate Reference System (CRS) of the TrueView LIDAR point data. This can be done by going to Images -> Transform Images… Select the proper CRS transformation and select OK.
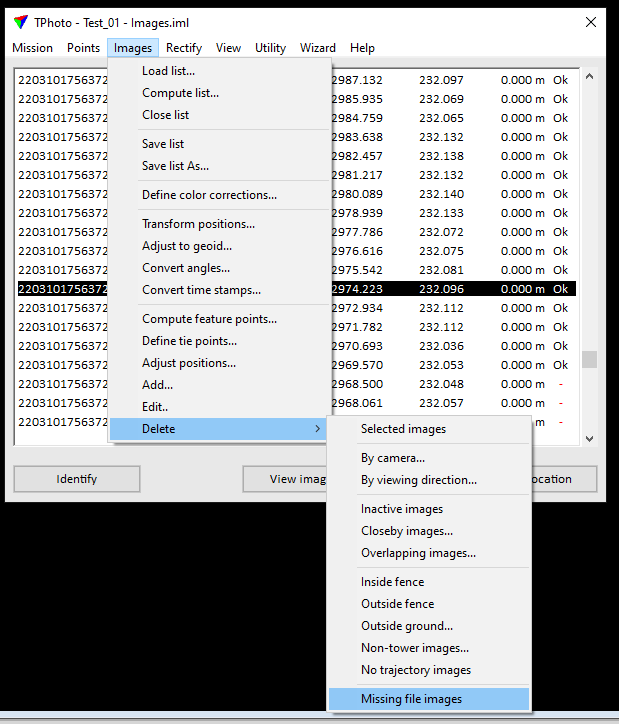
Removing missing image file references from the image list
If the images list contains images that are not present in the photo package image folders, the user can remove these by selecting Images -> Delete -> Missing File Images.