| This page is no longer updated. Please visit the updated page on the new LP360 Support Knowledge Base for the latest information. |
1. Introduction
In this article we will explain step by step how to process a TVGO dataset in LP360 Drone. The idea of the article is to serve as a quick user guide on processing. This article will not explain in detail each of the settings available in each step, that can be found either in the help section or in the LP360 Land User guide.
2. Import
1- Open LP360 2024.2.55 or newer
2- Select “Import Raw Missions into New Project…”
3- Select “TrueView GO”
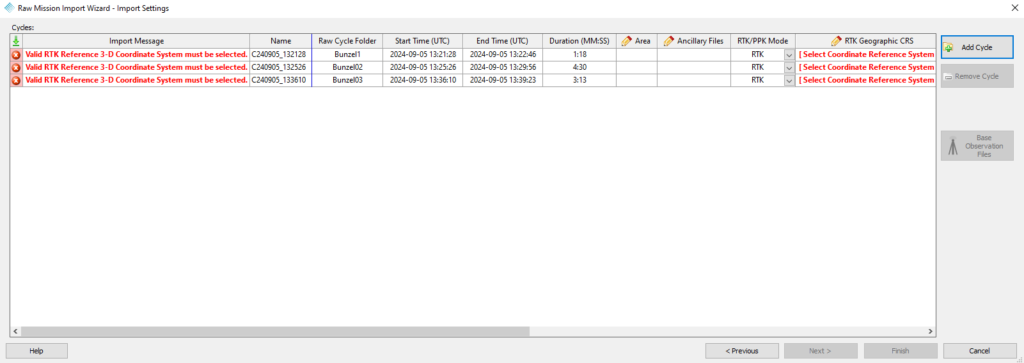
4- Press “Folder” to import the raw data from the sensor. You can select 1 or more cycles (datasets) to be process in the same project.
Note: the very first time you select TVGO data the software will ask you to install the LP360 sensor extension.

5- Now, select the processing mode in the “RTK/PPK Mode” column. There are 3 different types:
a) SLAM–> dataset acquired in a local coordinate system
b) RTK –> dataset georeferenced with a global coordinate system. The user needs to select the RTK Geographic CRS. The most common CRS are: “WGS84 + Ellipsoidal” (world), “NAD83(2011) + Ellipsoidal” (North America) and “ETRS89 + Ellipsoidal” (Europe).
c) PPK –> dataset georeferenced with a global coordinate system, it requires a base station. The user needs to select a rinex file and the coordinates of the base station.
6- Press Next
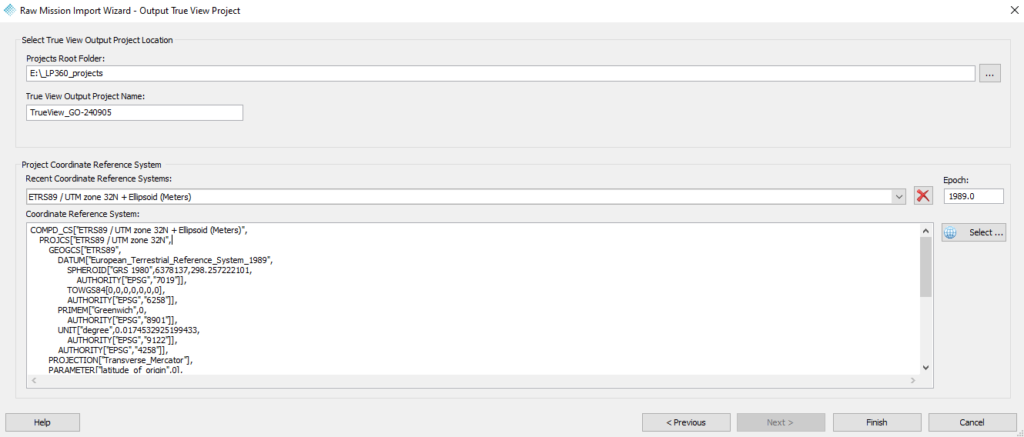
7- Select the Project Root Folder and the Project Name
8- Select the desired CRS

Tip: Select “Local Coordinate system” for SLAM datasets
9- Press Next –> The summary will be display –> Press next
10- Data imported
3. Point Cloud generation
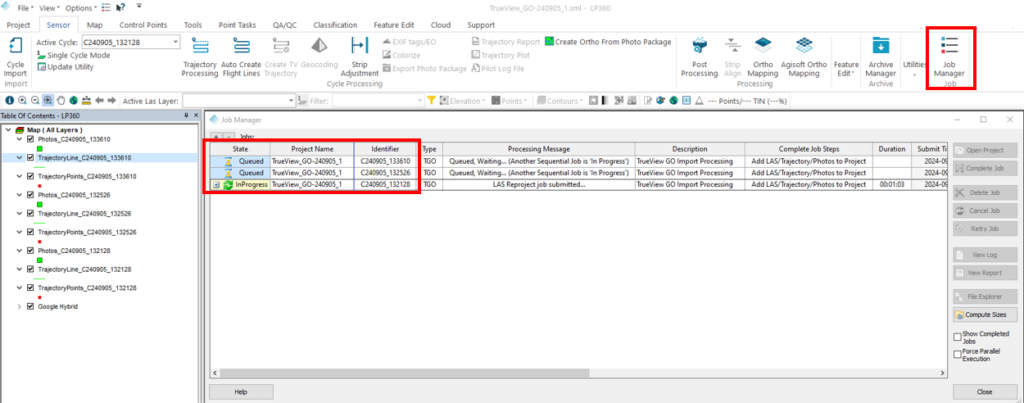
Once the cycles are imported into LP360, It will start automatically the processing of the raw data.
3.1. Job manager
1- Go to “Sensor” ribbon –>”Job manager”

2- Wait until the processing is completed –> Press “Complete Job”
3- It will appear a message asking if you want to proceed with creating “Flight Lines” or “Post Processing”
4- The point cloud is generated without filters
Tip: If you want to crop the trajectory, go to “Create Flight Lines”
3.2. Post Processing point cloud
It is possible to access “Autocreate Flight Lines” and “Post Processing” from the “Sensor” ribbon
1- Go to Sensor ribbon –> Post Processing tool
2- Select the Clip Angle
Tip: disable the filter for TVGO since we want to use the 360 degrees of the sensor
3- Select the Clip Range
4- Run Post Processing …
5- Post processing point cloud is generated

Note:
What is the difference between the point cloud directly from the job manager and the post processing?
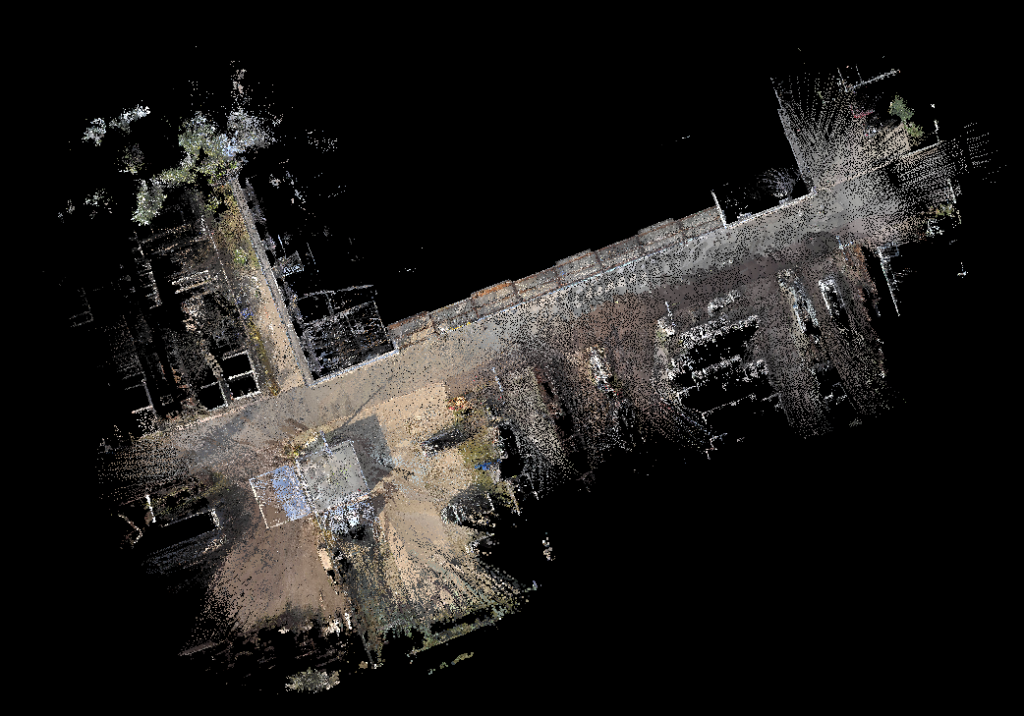
Both point clouds come from the same raw data, however one has all the data captured from the sensor (job manager point cloud) and the other is filtered by “Autocreate flight lines” &”Post Processing” .
In the following example it is possible to see how the clip range filter has removed far points captured by the sensor, remember that the sensor has a range up to 80 meters.
After this step we recommend continuing with the True View recommended workflow. Some of the steps recommended are “Registration”, “Smoothing“, “Control Points“, “Outliers removal” or “Ground Classification”.
If you have multiple TVGO datasets, it is highly recommended to perform “Registration” before doing any other step.


